[x]cube LABS is a leading digital strategy and solution provider specializing in enterprise mobility space. Over the years, we have delivered numerous digital innovations and mobile solutions, creating over $ 2 billion for startups and enterprises. Broad spectrum of services ranging from mobile app development to enterprise digital strategy makes us the partner of choice for leading brands.
The dawn of digital agriculture is upon us, and with it comes an array of technologies designed to increase efficiency and transparency in the food production and distribution process. Central to this revolution is the use of blockchain in agriculture. By integrating blockchain technology and smart contracts, stakeholders can create a more transparent, secure, and efficient agricultural system.
Blockchain in Agriculture: A Revolution in Transparency and Traceability
Blockchain technology has the potential to profoundly reshape agriculture. At its core, a blockchain is a transparent, immutable ledger of transactions. This means that once data is recorded, it cannot be altered, providing an unparalleled level of trust and accountability. In agriculture, this technology can be used to record a wide array of data, from planting, watering, and fertilizing crops to tracing the journey of produce from farm to table.
By harnessing blockchain in agriculture, we can ensure transparency and traceability throughout the entire food supply chain. Every transaction and exchange can be recorded on the blockchain, from the time a seed is planted, to when it is harvested, processed, and finally reaches the consumer. This level of detail can be critical in quickly identifying and addressing issues, such as outbreaks of foodborne illnesses, reducing the impact, and improving response times.
Smart Contracts: Automating Agriculture with Blockchain
Smart contracts – self-executing contracts with the terms of the agreement directly written into code – are another innovative application of blockchain in agriculture. These contracts automatically enforce and execute themselves when certain conditions are met, eliminating the need for intermediaries and reducing the chances of disputes.
For instance, a farmer could use a smart contract to automatically sell crops to a distributor once they reach a certain size or maturity level. The data can be collected through IoT (Internet of Things) devices and instantly recorded on the blockchain. This process reduces paperwork, streamlines operations, and expedites payments, all while maintaining a high level of security and transparency.
The Future of Digital Agriculture with Blockchain
The application of blockchain in agriculture signals a major step forward in the era of digital agriculture. While the technology is still in its early stages, the potential benefits are vast. From improving food safety and reducing fraud to promoting fair trade and sustainable farming practices, blockchain can address many of the challenges facing the agriculture industry today.
Moreover, the combination of blockchain technology with other digital innovations such as artificial intelligence, drones, and precision farming can unlock even greater potential. The future of digital agriculture is set to be more transparent, more efficient, and more sustainable thanks to the revolutionary power of blockchain.As we move forward, embracing the use of blockchain in agriculture will be crucial. In the face of a rapidly growing global population and increasing demands on our food system, the need for efficient and sustainable farming practices has never been greater. Blockchain technology, with its promise of transparency, security, and efficiency, might just be the key to unlocking the future of digital agriculture.
The field of agriculture has always been at the forefront of innovation and technological advancements. In recent years, the agricultural industry has witnessed a rapid evolution due to the emergence of new technologies. These cutting-edge solutions are revolutionizing the way we cultivate, harvest, and manage crops, leading to increased productivity, sustainability, and efficiency. This article explores the latest innovations in agriculture, highlighting the role of new technologies in driving transformative changes across the industry.
Precision Agriculture: Enhancing Efficiency and Sustainability
Precision agriculture is a game-changer in modern farming practices. It leverages advanced technologies, such as global positioning systems (GPS), remote sensing, and drones, to optimize the use of resources and increase yields. By collecting real-time data on soil composition, moisture levels, and crop health, farmers can make informed decisions regarding irrigation, fertilization, and pest control. This targeted approach minimizes wastage, reduces environmental impact, and enhances overall efficiency in agricultural operations.
Internet of Things (IoT): Connecting Farms for Smarter Agriculture
The Internet of Things (IoT) is transforming the way farms operate, creating a connected ecosystem of devices, sensors, and equipment. IoT devices can monitor and manage various aspects of farming, including soil moisture, temperature, livestock health, and machinery performance. Farmers can access real-time data remotely, enabling them to make data-driven decisions and optimize resources. IoT solutions also enable predictive maintenance, minimizing downtime and maximizing productivity. By embracing IoT technologies, farmers can streamline operations, reduce costs, and achieve greater sustainability.
Vertical Farming: Cultivating Crops in Controlled Environments
Vertical farming is a revolutionary concept that allows crops to be grown indoors in vertically stacked layers, utilizing limited space and resources. By employing advanced LED lighting, hydroponics, and automated systems, vertical farms create ideal conditions for plant growth. These controlled environments eliminate the need for pesticides, reduce water usage, and provide optimal temperature and lighting conditions. Vertical farming offers year-round cultivation, regardless of external weather conditions, making it a viable solution for urban areas and regions with limited arable land.
Robotics and Automation: Transforming Farm Labor
Robots and automation technologies are increasingly being integrated into agricultural practices, addressing labor shortages and improving efficiency. Autonomous robots can perform tasks such as seeding, planting, and harvesting with precision and speed. These robots are equipped with computer vision, machine learning, and AI algorithms, enabling them to identify and respond to crop variations, pests, and diseases. By reducing the reliance on manual labor, farmers can optimize productivity, reduce costs, and allocate resources more efficiently.
Blockchain: Ensuring Transparency and Traceability
Blockchain technology is gaining traction in the agricultural sector, offering a transparent and traceable system for supply chain management. Through blockchain, every step of the production and distribution process can be recorded, ensuring the authenticity and quality of agricultural products. This technology enhances food safety, reduces fraud, and strengthens consumer trust. Blockchain also enables farmers to receive fair compensation for their produce by eliminating intermediaries and creating direct connections with buyers.
Conclusion
The advent of new technologies in agriculture is driving a remarkable transformation in the industry. Precision agriculture, powered by GPS, remote sensing, and drones, is optimizing resource utilization and increasing yields. The Internet of Things (IoT) is creating a connected farming ecosystem, enabling real-time monitoring and data-driven decision-making. Vertical farming is revolutionizing crop cultivation by maximizing space and resources. Robotics and automation technologies are addressing labor shortages and improving productivity. Blockchain is ensuring transparency and traceability throughout the supply chain.As the agricultural industry embraces these new technologies, farmers can expect improved efficiency, sustainability, and profitability. However, it is essential to provide education and support to ensure the widespread adoption and integration of these innovations. With continued investment in research and development, the future of agriculture looks promising, with new technologies leading the way toward a more sustainable and food-secure world.
The world of farming is advancing rapidly with the help of technology, introducing concepts like precision farming and precision agriculture. But what exactly are they, and how do they revolutionize the way we grow our food?
Understanding Precision Farming and Precision Agriculture
Precision agriculture, often interchangeably used with precision farming, is an innovative approach that uses technology and data to optimize crop yields and enhance efficiency. Precision farming emphasizes the use of information technology and wide-ranging sensor technologies, including GPS, to manage variability in fields for crops and livestock.
Precision farming offers a solution for maximizing agricultural productivity while minimizing environmental harm. Through precision agriculture, farmers can use the right quantity of water, fertilizers, and pesticides at the right time and the right place. This approach results in not only cost-saving but also environment-friendly practices.
In-depth: The Role of Technology in Precision Agriculture
The cornerstone of precision farming lies in the application of technologies. Technologies like Global Positioning System (GPS), Geographic Information Systems (GIS), remote sensing, and on-ground sensors are instrumental in precision agriculture. These technologies help collect and process data on crop conditions, soil properties, weather patterns, and pest incidence.
For example, GPS-equipped machinery can deliver precise amounts of seeds, fertilizers, and pesticides to exact locations, reducing waste and enhancing crop yields. Similarly, drones equipped with multi-spectral imaging sensors can monitor plant health, detect pest and disease outbreaks, and optimize irrigation schedules.
The integration of these technologies in precision farming is a game-changer for the agriculture industry. It allows farmers to make informed decisions and manage their farms more efficiently.
The Benefits of Precision Agriculture
Precision agriculture holds immense benefits for farmers, the environment, and consumers. With precision farming, farmers can:
Increase productivity and profitability by optimizing resource use.
Reduce environmental impact through precise application of inputs.
Improve sustainability of farming operations.
Enhance crop quality, thus benefiting consumers with high-quality produce.
Conclusion: The Future of Precision Farming
The future of precision agriculture looks promising. With advances in technology like artificial intelligence, machine learning, and big data analytics, precision farming is set to redefine the future of farming.
Precision agriculture is more than just a trend; it’s an answer to the pressing problems of food security, environmental sustainability, and farm profitability. As technology continues to evolve, so will the possibilities for precision farming, offering a bright future for the agriculture industry.
For farmers looking to optimize their yield and reduce their environmental footprint, precision farming provides a compelling solution. The future of farming is here, and it is precise, efficient, and sustainable.
In conclusion, precision farming and precision agriculture are transforming the agro-industry. They are offering farmers an effective way to increase productivity, reduce costs, and enhance sustainability, making them indispensable tools for modern agriculture.
The advent of Artificial Intelligence (AI) and Machine Learning (ML) has brought about a seismic shift in numerous sectors, and agriculture is no exception. This article explores the transformative influence of AI in agriculture, particularly its intersection with machine learning in enabling smart farming practices.
Understanding AI and Machine Learning in the Agricultural Sphere
AI in agriculture involves the use of automated algorithms to perform tasks traditionally done by humans. It leverages machine learning, a subset of AI, where machines learn from data, identify patterns, and make decisions with minimal human intervention. The merger of AI and ML in farming has opened up new frontiers of possibilities, offering innovative solutions to maximize efficiency and productivity.
The Applications of AI and Machine Learning in Smart Farming
Crop Health and Pest Prediction: AI-powered predictive analytics can forecast crop health and potential pest threats. By processing data from sensors, satellites, and drones, machine learning algorithms can provide timely alerts, allowing farmers to take preventive measures.
Precision Farming: Precision agriculture, facilitated by AI in farming, ensures optimal use of resources. AI and ML algorithms analyze various factors like soil condition, weather patterns, and plant physiology to advise on the best planting and harvesting strategies.
Livestock Monitoring: Advanced AI technologies can monitor livestock’s health and behavior, alerting farmers about any anomalies. This not only ensures animal welfare but also helps in the timely detection and treatment of diseases.
Automated Irrigation Systems: AI-driven irrigation systems analyze weather forecasts, soil conditions, and plant water requirements to deliver precise watering, thereby conserving water and improving crop yield.
The Impact of AI on Agriculture and Smart Farming
The role of AI in farming goes beyond automation; it brings an era of intelligence and precision to agriculture. It assists farmers in making data-driven decisions, thus reducing costs, maximizing yield, and promoting sustainable farming practices. Additionally, it brings predictability to a historically unpredictable sector, mitigating risks associated with volatile weather conditions and market fluctuations.
Challenges and Future of AI in Agriculture
Despite its immense potential, the application of AI in agriculture is not without challenges. These include high setup costs, lack of technical skills among farmers, and data privacy issues. Furthermore, the AI systems’ effectiveness is dependent on the quality and quantity of data, which can be challenging to obtain in certain regions.
However, the future of AI in farming is promising. With advancements in technology, AI solutions are becoming more affordable and accessible. Moreover, as digital literacy improves, more farmers are likely to adopt these innovative solutions, resulting in a more resilient and sustainable agricultural sector.
Conclusion
The infusion of AI and machine learning in smart farming has set the stage for an agricultural revolution. As these technologies continue to mature, they promise to make farming more efficient, sustainable, and profitable. While challenges persist, the potential benefits of AI in agriculture far outweigh them. Indeed, in the face of a growing global population and environmental changes, AI in farming could very well be the catalyst that secures our future food supply.
With the onset of the Fourth Industrial Revolution, technology continues to seep into various sectors, including the agriculture industry. This article will delve into one of the pivotal innovations driving agricultural growth – the Internet of Things (IoT) in agriculture, specifically its symbiosis with sensors for smart farming.
The Power of IoT in Agriculture
IoT in agriculture has been a game-changer, with sensors playing a crucial role in enabling precise, real-time monitoring and data collection. The use of IoT technologies helps farmers monitor field conditions without manual intervention and gather accurate data to optimize yield, reduce operational costs, and minimize environmental impact.
Sensors: The Eye of Smart Farming
Sensors form the backbone of IoT in agriculture. These tiny, technologically advanced devices monitor various environmental factors like soil moisture, temperature, humidity, and pH levels. Connected to the IoT network, they can transmit real-time data to a centralized system for analysis, enhancing efficiency and productivity.
The role of sensors in smart farming is pivotal, as they allow farmers to monitor their crops’ health and their livestock’s well-being round the clock. From soil moisture sensors that prevent overwatering to temperature sensors that monitor the optimal climate for growth, they equip farmers with vital information, creating a seamless blend of technology and traditional farming practices.
Benefits of IoT and Sensors in Smart Farming
IoT and sensors bring numerous benefits to smart farming. Let’s delve into a few of them:
Precision Agriculture: With IoT and sensors, farmers can make informed decisions about the right quantity and time for fertilizers, water, and pesticides, leading to sustainable farming and reducing resource wastage.
Livestock Monitoring: Using wearables and embedded sensors, farmers can monitor the health and location of their livestock, predicting illnesses early and improving animal welfare.
Smart Greenhouses: IoT-enabled sensors regulate and control the environment within the greenhouse, reducing human intervention and increasing productivity.
Real-time Monitoring: Farmers can monitor their farms remotely, receiving real-time notifications about any anomalies, leading to swift decision-making and immediate action.
Data-Driven Decisions: The ability to analyze vast amounts of data gathered by sensors allows farmers to make evidence-based decisions, increasing yield and profitability.
Challenges and Future of IoT in Agriculture and Smart Farming
Despite the enormous benefits, integrating IoT in agriculture does come with its own set of challenges. Infrastructure cost, lack of technical know-how, data privacy, and security are some of the obstacles that need addressing.
Nevertheless, the future of smart farming, driven by IoT and sensors, looks promising. As the world grapples with population growth and climate change, efficient agricultural practices are becoming more crucial than ever. Innovations in IoT and sensor technology are continuously emerging, making smart farming more affordable and accessible.
Conclusion
The use of IoT in agriculture, particularly the integration of sensors in smart farming, is transforming the agricultural landscape. As we move towards a more digitized and automated world, the fusion of IoT and sensors will continue to evolve, paving the way for a sustainable, efficient, and productive future in farming.
As we sail into the digital age, technology has its hand in almost every sector, and agriculture is no exception. Welcome to the world of Agritech, also known as agriculture technology. Agritech is revolutionizing farming practices, streamlining operations, and creating opportunities for farmers worldwide. This article provides an in-depth look into the realm of agritech, how it shapes the future of agriculture, and why it is crucial for sustainable farming.
What is Agritech?
Agritech is the amalgamation of technology and agriculture designed to improve efficiency and productivity. It employs advanced technologies, such as artificial intelligence (AI), machine learning (ML), drones, satellite imaging, and IoT (Internet of Things), to manage and optimize agricultural operations. From crop health monitoring to automated farming, agritech is reshaping traditional agricultural practices.
The Role of Agriculture Technology in Modern Farming
Agriculture technology has a multifaceted role in modern farming, improving not just the quantity but also the quality of produce while minimizing environmental impact.
Precision Agriculture: Agritech enables precision farming by providing accurate data about the soil condition, weather patterns, and crop health. This data-driven approach allows farmers to tailor their strategies and resource usage according to the specific needs of the crops.
Automation and Robotics: Automated machinery and robotics reduce manual labor and increase efficiency. Tractors equipped with GPS, automated irrigation systems, drones for crop monitoring, and robotic harvesters are some examples of how agritech can minimize human error and enhance productivity.
Sustainable Farming Practices: Agritech promotes sustainable farming by optimizing resource usage and reducing waste. Smart irrigation systems, for instance, use real-time data to regulate water usage, and precision farming ensures optimal use of fertilizers, reducing the environmental impact.
Supply Chain Management: Agriculture technology provides solutions for better tracking and management of the supply chain, ensuring produce gets from farm to table more efficiently and reducing post-harvest losses.
The Future of Agritech
Agritech is the future of farming, leveraging cutting-edge technology to address food security, climate change, and sustainability issues. As technology continues to evolve, we can expect even more innovative solutions. AI and ML will play an increasingly central role, making predictions and decisions based on collected data. Advanced robotics will further automate farming practices, and the use of blockchain in the supply chain will enhance traceability and transparency.
The importance of agritech goes beyond just improving farming practices. As the global population continues to grow, the demand for food will increase. Agriculture technology provides us with tools to meet this growing demand without straining our natural resources.
Conclusion
Agritech, or agriculture technology, is revolutionizing the farming industry. From enhancing crop yields and quality to promoting sustainable farming practices, agritech is paving the way for a more efficient and sustainable future. As technology continues to advance, agritech will undoubtedly play a pivotal role in shaping the future of agriculture, making it an exciting field to watch.
In the 21st century, the agricultural sector is no longer solely about tilling the soil and herding cattle. It has transcended into an era of sophisticated farming practices where digital agriculture and agritech are revolutionizing the ways we grow, manage, and distribute food. This article will explore the different types of modern agriculture that have emerged as a result of these technological advancements.
1) Precision Agriculture
At the heart of digital agriculture is precision agriculture. This method involves using GPS mapping and other digital technologies to monitor and optimize crop yields. Precision agriculture is synonymous with efficiency. It allows farmers to use resources like water, fertilizer, and seeds more efficiently by applying them only where they are needed in the fields.
2) Vertical Farming
One of the most innovative types of modern agriculture facilitated by agritech is vertical farming. In this system, crops are grown in stacked layers, often in controlled environments. This technology-focused farming method is particularly useful in urban environments where land is limited.
3) Hydroponics
Another impressive stride in agritech is the adoption of hydroponics. This method involves growing plants without soil by using mineral nutrient solutions in a water solvent. It allows for precise control over the nutrients a plant receives and enables farming in locations with poor soil quality or limited space, thus promoting sustainable agriculture.
4) Aeroponics
Aeroponics, a subset of hydroponics, involves growing plants in an air or mist environment without the use of soil. As an offshoot of agritech, it reduces water usage by up to 98 percent, making it a potential solution for areas with water scarcity.
5) Robotic Farming
Arguably, one of the most exciting intersections of agritech and digital agriculture lies in robotic farming. Agricultural robots can perform tasks such as planting, harvesting, and monitoring crops more efficiently and accurately than human labor. These smart machines are a significant boon in tackling labor shortages and reducing operational costs.
6) Drones in Agriculture
Drones, or unmanned aerial vehicles (UAVs), have found their place in the realm of modern agriculture. They are used for crop scouting, disease detection, and even precision spraying. By providing real-time data about the state of crops, drones facilitate informed decision-making, improving yield and productivity.
7) Genetically Modified Crops
Genetically modified (GM) crops are a product of modern agriculture technology. Genetic engineering helps create crops resistant to pests and diseases, tolerant to harsh environmental conditions, and even nutritionally enriched. This area of agritech could be vital in addressing global food security challenges.
8) Agri-Biotechnology
Agri-biotechnology is another growing field that combines the principles of biology and agritech. It is used to enhance crop production, improve livestock health, and develop bio-based fuels. Agri-biotechnology is shaping the future of farming with more sustainable and efficient solutions.
9) IoT in Agriculture
The Internet of Things (IoT) is making waves in digital agriculture. IoT devices are used to monitor soil moisture, weather conditions, crop growth, and livestock movement. This real-time data helps farmers to make quicker and more informed decisions, increasing the overall efficiency of farm operations.
Conclusion:
As we delve into an era where agritech and digital agriculture are paramount, we witness a transformation in our approach to farming. These modern agricultural types present a potential solution to some of the most pressing issues of our time, including food security, environmental sustainability, and climate change. This agritech revolution not only offers increased productivity and efficiency but also drives us toward a more sustainable and food-secure future.
Docker containers have recently revolutionized software development and deployment, offering lightweight, portable, and scalable solutions. However, with the increasing adoption of Docker, the need for robust security measures has become paramount.
Containerization, made possible by Docker, has completely changed how we create, distribute, and manage programs. Docker makes effective application deployment possible across various contexts of product engineering because of its portable and scalable nature.
To guard against potential weaknesses and assaults, the Docker containers and hosts need strong security measures, just like any other technology. This post will examine recommended practices for protecting containers created with Docker and the Docker host to create a more secure and robust containerized environment.
Docker has become a top platform for deploying and managing containerized applications as interest in containerization keeps growing. However, as Docker becomes more widely used, there will be a greater need for adequate security controls to safeguard both the containers and the underlying Docker host. This article aims to provide a comprehensive guide on securing Docker containers and the Docker host, ensuring that your containerized applications remain protected from potential threats.
Security Risks in Docker Container Deployment
Uncontrolled Movement and Dangerous Communication: Some Docker versions default to allowing all network traffic on the same host, which may expose data unintentionally to the wrong containers.
Images of Vulnerable and Malicious Containers: The Docker Hub registry is home to more than 100,000 open-source container repositories, some containing modified and unofficial iterations of popular images. When you deploy a new repo to Docker Hub, you should trust the publisher because it is accessible to everyone.
Unhindered Reach: Once they have a foothold in the host, attackers can frequently access several containers. A container with access to the system file directory can compromise security measures. Attackers who have root access to the host may also have root access to the containers.
Vulnerabilities in the Host Kernel: The kernel’s vulnerabilities are critical because they are accessible to the host and all containers. A container can bring down the entire host if it triggers a kernel panic.
Escape from Containers: Container breakouts are uncommon, and attackers shouldn’t be able to access the host or other containers.
Users are not namespaced by default, so a process is granted the privileges granted to the container host. Privilege escalation is possible since root access in the container will become root access on the host.
Docker Container Deployment Tips and Tricks
Use Official Images: When building Docker containers, relying on official Docker images from trusted sources is essential. Official photos are regularly updated, ensuring that any known vulnerabilities are patched. Using reputable sources minimizes the risk of malicious or compromised container images.
Keep Docker Up-to-Date: Ensuring that Docker is running on the most recent version is one of the core components of container security.
Maintaining an up-to-date Docker installation is crucial for security. New versions often include bug fixes and security patches that address vulnerabilities discovered in earlier versions. Regularly check for updates and promptly apply them to your Docker host.
The development community for Docker actively seeks out and fixes security flaws, making frequent upgrades essential to keep secure. By regularly upgrading Docker, you can be sure that you’re using the most recent security updates and bug patches.
Secure Docker Host: Securing the Docker host is as important as securing the containers. Ensure the host machine has the latest security updates, and use a strong password for the Docker daemon. Additionally, restrict access to the host by allowing only authorized users to interact with Docker.
Isolate Containers: To prevent the compromise of multiple containers, isolating them from each other is recommended. Utilize Docker’s network and namespace features to ensure containers are isolated, limiting communication between them. This way, if one container is compromised, the attacker’s access remains restricted.
Implement Resource Limitations: Controlling resource allocation is essential to prevent resource exhaustion attacks—Configure resource limitations for each container’s memory, CPU, and disk usage. By doing so, you ensure that one container cannot consume all available resources, affecting the performance and stability of other containers.
Enable Docker Content Trust: Docker Content Trust ensures the integrity and authenticity of images during the containerization process.
By enabling Docker Content Trust, Docker will only pull and run pictures that have been signed and verified using digital signatures. This prevents the execution of tampered or malicious images.
Implement Role-Based Access Control (RBAC): RBAC allows you to define fine-grained access controls for Docker resources.
By assigning roles and permissions to users or user groups, you can restrict unauthorized access to Docker commands, containers, networks, and volumes. Implementing RBAC ensures that only authorized individuals can manage and interact with Docker resources.
Container Image Scanning: Before deploying container images, perform thorough vulnerability scans to identify potential security issues.
Several third-party tools can automatically scan container images for known vulnerabilities. Regularly review and update your ideas to ensure they are free from known vulnerabilities.
Use Secrets Management: Sensitive information, such as API keys and database credentials, should never be hardcoded within the container images. Instead, utilize Docker’s secrets management feature to store and provide sensitive information to containers at runtime securely. Secrets management ensures that critical information remains protected and inaccessible to unauthorized individuals.
Monitor Docker Environment: Implementing robust monitoring solutions allows you to detect suspicious activities and potential security breaches in your Docker environment.
Monitor container behavior, network traffic, and system logs to identify anomalies. Additionally, consider implementing intrusion detection and prevention systems to enhance the overall security of your Docker environment.
Enable Docker Content Trust: Docker Content Trust ensures the integrity and authenticity of images during the containerization process.
By enabling Docker Content Trust, Docker will only pull and run pictures that have been signed and verified using digital signatures. This prevents the execution of tampered or malicious images.
Implement Tight Access Controls: Tight access controls prevent attacks and unauthorized access to Docker resources. Use these access control best practices:
Limit user rights: Only provide people access to the resources required to carry out Docker-related tasks. Run containers without root access whenever you can.
Use resource constraints and namespaces: To stop container escapes and resource misuse, implement resource isolation using namespaces, control groups (groups), and Docker security profiles.
Utilize Docker’s secrets: Instead of hardcoding sensitive information into container images, store it as a Docker secret, such as API keys or database credentials.
Employ Best Practices for Image Security: Docker containers are built from container images. You can reduce the risk of deploying hacked or insecure containers by adhering to image security best practices:
Use official photos or sources you can trust: Use well-known repositories or approved Docker images to reduce the possibility of installing containers that contain malicious malware.
Update base images frequently: Pull the most recent updates to keep your container images current. This guarantees the incorporation of security patches and updates.
Check for image weaknesses: Before putting container images into production, use image scanning tools to find and fix issues.
Containers for Isolation: Container isolation is essential for stopping threats from spreading laterally within the Docker environment. Think about the following strategies:
Use network segmentation to limit container communication by using Docker’s networking features to establish distinct networks for various types of containers.
Use tables or Docker’s built-in firewall feature to establish network rules and restrict container communication when implementing container firewalls.
Utilize user namespaces: To reduce the danger of container escapes, utilize user namespaces to map container user IDs to non-privileged user IDs on the host.
Keep an Eye on Container Activity: Monitoring container activity offers valuable information about possible security lapses and performance problems. Consider the following monitoring techniques:
Enable Docker logging for auditing and troubleshooting purposes by configuring Docker to record all container activity, including start/stop events and system calls.
Put container orchestration into practice: Increase visibility and control using container orchestration technologies like Kubernetes or Docker Swarm to manage and monitor containers at scale.
Use container security tools: To understand container behavior and potential risks better, investigate security tools made especially for container settings, such as Docker Security Scanning or third-party solutions.
Back-Up Frequently and Test: To guarantee business continuity in a security incident or system failure, it is essential to routinely back up important Docker components and test the restoration procedure.
Back up the Docker host, container volumes, and crucial configuration files to a safe location, and test the restoration procedure regularly to ensure that everything works properly.
Train and Educate Users: Finally, but most significantly, inform and instruct users on appropriate practices for Docker security. Ensure that anybody working with Docker containers, including developers, administrators, and other staff, is informed of potential security risks.
Avoid Granting Access Authorization: The simplest method to get a Docker container to work successfully may be to run it with root access because you won’t need to worry about complicated permission management. However, there are a few reasons to run containers as root in a real-world setting.
You don’t need to alter the default setup of Docker containers because they don’t operate as root by default, but you should avoid giving root permissions.
Using the MustRunAsNonRoot directive in a pod security policy while using Kubernetes will explicitly prevent administrators from running containers with root access, enhancing security.
Conclusion:
A multi-layered strategy combining best practices, robust configuration, and continuous monitoring is needed to secure Docker containers and the Docker host.
Enterprises using these tactics to establish a more secure container environment can reduce the risk of vulnerabilities, unauthorized access, and data breaches. Containers can offer a healthy and safe environment for delivering apps at scale using Docker’s flexibility and the implementation of suitable security measures.
Securing Docker containers and the Docker host is crucial for maintaining a safe and protected environment for your applications. Following the best practices outlined in this guide can significantly reduce the risk of unauthorized access, container compromise, and potential data breaches.
Remember that security is an ongoing process that requires regular updates, monitoring, and adherence to security best practices to ensure a robust Docker infrastructure.
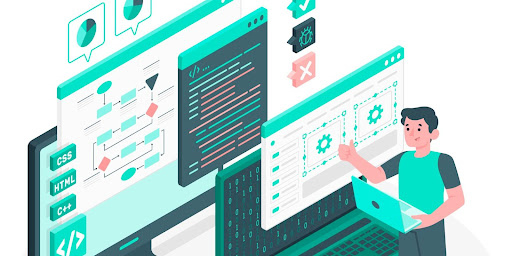
In the fast-paced world of software development, time is of the essence. Programmers and developers continuously strive to improve efficiency, seeking tools and techniques to help them quickly and effectively produce high-quality code. One indispensable tool in the developer’s arsenal is the code editor.
As the central hub for writing, editing, and organizing code, a well-configured code editor can significantly impact productivity, streamlining the development process and making it easier to maintain and collaborate on projects.
Whether you’re a seasoned programmer or just starting your journey in software development, understanding the full potential of your online code editor is crucial for success. With the proper knowledge and techniques, you can optimize your code editor into a productivity powerhouse, making it easier to write, maintain, and collaborate on code.
This blog post aims to provide valuable tips and insights on getting the most out of your code editor to boost productivity. By implementing these tips, you can elevate your coding experience and become a more effective and efficient developer.
Choose the Right Code Editor
Selecting the best code editor online that suits your needs and preferences is vital and is the first step toward increasing productivity. When deciding, consider factors like language support, extensibility, performance, and user interface.
Popular code editors include Visual Studio Code, Sublime Text, and Atom. Each has unique features and strengths, so take the time to research and try them out to find the perfect fit. When choosing a code editor, consider your preferred programming language, development workflow, and the available extensions and plugins.
For example, if you’re looking for an HTML code editor, ensure the editor provides robust support for HTML syntax highlighting and auto-completion. Similarly, if you primarily work with Python, prioritize a Python code editor with features tailored to Python development, such as debugging tools and integration with virtual environments. Selecting the right Javascript code editor can significantly impact your coding experience and productivity.
Master Keyboard Shortcuts
Keyboard shortcuts can save valuable time and increase efficiency in a code editor. They allow you to navigate through files, edit code, and perform various tasks without reaching for the mouse.
Familiarize yourself with shortcuts for navigation, editing, and other tasks. For example, learn to switch between tabs, jump to specific lines, or comment out code quickly. Additionally, consider creating custom shortcuts for frequently performed actions to streamline your workflow further.
Use Code Snippets and Templates
Code snippets and templates are pre-written pieces of code that can be quickly inserted into your project. Utilizing these tools can save time and reduce repetitive tasks by automating them. Popular built-in and third-party snippet libraries and template plugins include Emmet and Visual Studio Code snippets, and these offer predefined code structures for specific languages and frameworks. When looking for the best code editor, consider the availability and usability of snippet libraries and template plugins to streamline your development process.
Learn to create custom snippets and templates tailored to your programming languages or frameworks for maximum efficiency.
4. Implement Syntax Highlighting and Code Formatting
Syntax highlighting and code formatting enhance readability and help prevent errors. Many code editors come with built-in syntax highlighting and formatting, too. In contrast, others, like Prettier and ESLint, can be installed as extensions to format your code automatically according to predefined rules.
Customize syntax highlighting colors and code formatting settings to suit your preferences and increase overall code clarity.
Use Version Control Integration
Version control is essential for managing software development projects, allowing you to track changes, create branches, resolve conflicts, collaborate with others, and revert to previous code versions.
Popular version control systems include Git and Mercurial. Many code editors offer built-in integration with these systems, streamlining the version control process and allowing you to perform actions directly within the editor.
Utilize Code Linting and Error Detection Tools
Code linting and error detection tools analyze your code for potential issues and enforce coding standards, and this helps you catch problems early and improve your productivity.
Tools like ESLint, JSHint, and Stylelint can be integrated into your code editor to provide real-time feedback and suggestions, scan your code for potential issues, and recommend improvements. Configure and customize these tools to match your preferred coding style and prevent common mistakes to ensure consistent code review quality.
Leverage Code Editor Extensions and Plugins
Extensions and plugins significantly extend the functionality of your code editor, catering to your specific needs. Popular and valuable extensions like Debugger for Chrome and Python extension for Visual Studio Code make your development process smoother.
Regularly explore and experiment with new extensions and plugins to optimize your code editor for the languages and frameworks you work with.
Customize Your Code Editor Workspace
Personalizing your code editor workspace can improve productivity and minimize distractions by making it easier to focus on the task. Organize files and folders, modify UI elements, and configure editor settings to create a workspace that suits your preferences.
Consider creating multiple workspaces for different projects or tasks to keep your environment organized and clutter-free.
Learn Advanced Search and Replace Features
Advanced search and replace features can significantly improve code editing efficiency by allowing you to find and modify code quickly. Techniques like regex, case sensitivity, and scope filtering can help you quickly find and modify code. Refine your search and replace skills to make code updates and refactoring faster and more accurate.
Collaborate Effectively with Others
Collaboration is vital to software development, and code editors can facilitate teamwork through features and tools like Live Share and GitLens. Improve your collaboration skills by practicing effective communication, adhering to version control etiquette, and providing clear and concise code comments.
Utilize the collaboration features within your code editor to streamline the working process with your team, making it easier to share code, resolve conflicts, and discuss ideas.
Conclusion
Using code editors effectively can significantly boost your productivity as a developer. You can create a customized and efficient development environment by choosing the right code editor, mastering keyboard shortcuts, utilizing code snippets and templates, implementing syntax highlighting and code formatting, integrating version control, and leveraging extensions and plugins catering to your needs. Customizing your workspace, refining advanced search and replace features, and collaborating effectively with others can further enhance your productivity.
By implementing these tips and embracing the full potential of your code editor, you can elevate your coding experience, streamline your workflow, and ultimately become a more effective and efficient developer. So, unlock the true power of your code editor to achieve new productivity levels in your product engineering journey.
As technology evolves, virtualization and containerization have become key elements in the IT landscape. When we talk about containerization, Docker inevitably takes center stage. Docker is a cutting-edge platform used to develop, deploy, and run applications by leveraging containerization. However, managing multiple Docker containers, particularly on a large scale, could be challenging. That’s where Docker Swarm mode comes in. This article will provide an in-depth introduction to Docker Swarm mode and its numerous benefits.
Understanding Docker
Docker is a tool designed to make creating, deploying, and running applications easier by using containers. Containers allow developers to package up an application with all the necessary parts, such as libraries and other dependencies, and ship it all out as one package. This ensures that the application will run on any other Linux machine regardless of any customized settings that the machine might have that could differ from the machine used for writing and testing the code.
What is Docker Swarm Mode?
Docker Swarm is a built-in orchestration tool for Docker that helps you manage a cluster of Docker nodes as a single virtual system. When operating in Swarm mode, you can interact with multiple Docker nodes, each running various Docker services. Docker Swarm automatically assigns services to nodes in the cluster based on resource availability, ensuring a balanced and efficient product engineering system.
Docker Swarm mode simplifies scaling Docker applications across multiple hosts. It allows you to create and manage a swarm, a group of machines running Docker configured to join together in a cluster.
Key Benefits of Docker Swarm Mode
Docker Swarm mode is packed with many benefits that set it apart from other container orchestration tools. Some of its key benefits include:
1. Easy to Use
Docker Swarm mode is incredibly user-friendly. It integrates seamlessly with the Docker CLI, and its commands are quite similar to those of Docker, making it easier to get accustomed to. This makes it easy for developers familiar with Docker to adopt Swarm mode.
2. Scalability
Scalability is another significant advantage of Docker Swarm mode. It allows you to increase or decrease the number of container replicas as your needs change. This feature is particularly useful in production environments, where the ability to scale quickly and efficiently can be vital.
3. High Availability
Docker Swarm mode also ensures high availability of services. If a node fails, Docker Swarm can automatically assign the node’s tasks to other nodes, ensuring that services remain available and minimizing downtime.
4. Load Balancing
Docker Swarm mode comes with a built-in load-balancing feature. It automatically distributes network traffic among active containers, ensuring efficient use of resources and enhancing application performance.
5. Security
Security is a major focus in Docker Swarm mode. It uses mutual TLS encryption and certificates to secure communication between nodes in the Swarm, ensuring the integrity and confidentiality of your data.
Conclusion
In conclusion, Docker Swarm mode is a powerful tool that enhances Docker’s capabilities by offering advanced features such as easy scalability, high availability, load balancing, and strong security. Whether you’re a small-scale developer or a large enterprise, integrating Docker Swarm mode into your Docker usage can lead to more efficient, reliable, and secure application deployment and management.
Before we delve into the nuts and bolts of building and deploying large-scale applications with Docker, it’s essential to address the question: “What is Docker?”. Docker is a revolutionary platform designed to simplify developing, shipping, and running applications. Its key feature lies in its ability to package applications and their dependencies into a standardized unit for software development known as a Docker container.
Understanding Docker Containers
A vital follow-up to “What is Docker?” is understanding “What is a Docker container?” Docker containers are lightweight, standalone, executable software packages that include everything needed to run a piece of software, including the code, a runtime, libraries, environment variables, and config files.
The beauty of Docker containers is that they are independent of the underlying system. This means they can run on any computer, on any infrastructure, and in any cloud, eliminating the usual complications of shifting software from one computing environment to another.
How to Use Docker: Building and Deploying Applications
So, how to use Docker in building and deploying large-scale applications? The process can be divided into several key steps:
1. Set Up Docker Environment
The first step is to install Docker. Docker is available for various operating systems, including Windows, macOS, and multiple Linux distributions.
2. Write a Dockerfile
A Dockerfile is a text file that Docker reads to build an image automatically. This file includes instructions like what base image to use, which software packages to install, which commands to run, and what environment variables to set.
3. Build a Docker Image
Once you have a Dockerfile, you can use Docker to build an image. The Docker build command takes a Dockerfile and creates a Docker image. This image is a snapshot of your application, ready to be run on Docker.
4. Run the Docker Container
After building your Docker image, you can use it to run a Docker container. The Docker run command does this. It takes a Docker image and runs a container. At this point, your application is running inside a Docker container.
5. Push Docker Image to Docker Hub
Docker Hub is a cloud-based registry service that allows you to link to code repositories, build your images, test them, store manually pushed images, and link to Docker Cloud. Once your Docker image is built, you can move it to Docker Hub, making it available to any Docker system.
6. Deploying the Docker Container
You can deploy Docker containers in a variety of ways. For small-scale deployment, you can use Docker Compose. For larger deployments, you can use tools like Docker Swarm or Kubernetes. These orchestration tools help you manage, scale, and maintain your Docker containers across multiple servers.
Conclusion
Docker has radically simplified the process of product engineering, application development, and deployment. It’s a versatile tool that eliminates “works on my machine” problems and provides the consistency required for large-scale applications.
By understanding “what is Docker?”, “How to use Docker?” and “What is a Docker container?” you can leverage this technology to scale and deploy your applications efficiently and reliably, regardless of the infrastructure you’re working with. It’s an essential tool for any modern developer’s toolkit.
Whether you’re building a small application for local use or a large-scale application for a global audience, Docker provides a level of simplicity and scalability that was previously unimaginable. So dive in and start exploring what Docker can do for you!
If you’re involved in the IT sector, especially in product engineering, system administration, or DevOps, you’ve probably heard the term “containers” being tossed around quite a bit. But what are containers, exactly? How does the container image format work? In this blog, we will delve deep into these questions and help you understand containers and the magic they bring to the world of software development.
What Are Containers?
Containers are standalone software units that package code and all its dependencies so the application runs quickly and reliably from one computing environment to another. A container might be a lightweight package of software that includes everything necessary to run an application, including the system tools, system libraries, settings, and runtime. They allow developers to encapsulate their applications in a bubble, providing consistency across multiple platforms and deployment scenarios.
Understanding the Container Image Format
Now that we know what containers are, let’s move on to understanding the container image format. A container image is a lightweight, standalone, executable package that includes everything needed to run the software, including the code, a runtime, system tools, system libraries, and settings.
Container images are built from a base or a parent image. They use a layered file system. Each modification is stored as a layer, which helps minimize disk usage and increase the speed of the building process. Every image starts from a base image, such as ‘ubuntu:14.04,’ and then extends it by installing software or changing the system.
How Do Containers Work?
In addition to namespaces and control groups, containerization technology leverages other vital components to enable efficient and secure container deployment:
Union File Systems: Union file systems, such as OverlayFS and AUFS, enable the layering of file systems to create lightweight and efficient container images. These file systems allow for stacking multiple layers, each representing a different aspect of the container image, such as the base operating system, application code, and dependencies. This layering approach facilitates faster image creation, distribution, and sharing while conserving storage space.
Container Runtimes: Container runtimes, such as Docker Engine and Container, are responsible for managing the lifecycle of containers, including starting, stopping, and managing their execution.
These runtimes interact with the underlying kernel features, such as namespaces and control groups, to provide containers with the necessary isolation and resource management. They also handle tasks like networking, storage, and image management, ensuring a seamless user experience when working with containers.
Container Orchestration Platforms: Container orchestration platforms, such as Kubernetes and Docker Swarm, simplify the management of containerized applications at scale. These platforms automate tasks like container deployment, scaling, and scheduling across clusters of machines.
They also provide service discovery, load balancing, and health monitoring features, enabling high availability and resilience for distributed applications. Container orchestration platforms abstract the complexities of managing individual containers, allowing developers to focus on building and deploying applications.
Container Registries: Container registries, such as Docker Hub and Google Container Registry, serve as repositories for storing and distributing container images.
These registries allow developers to publish their containerized applications, share them with others, and pull them down for deployment. Container registries also provide versioning, access control, and vulnerability scanning features, ensuring the security and integrity of container images throughout their lifecycle.
By combining these technologies, containerization enables developers to build, package, and deploy applications consistently, safely, and scalable, driving agility and efficiency in modern software development and deployment workflows.
Docker and Containers
While discussing containers, it’s impossible to skip Docker. Docker is an open-source platform that revolutionized the containerization landscape by providing tools to automate application deployment, scaling, and management as containers. Docker introduced its container image format, Docker Image, which quickly became the de facto standard for packaging and distributing containerized applications. This format simplifies creating, sharing, and running applications across different environments, making it easier for developers to build and deploy software.
However, as container adoption grew, the need for a more standardized approach emerged. To address this, the Open Container Initiative (OCI) was established to provide a standard specification for container runtime and image formats. This initiative promotes interoperability and portability across different container platforms and tools. The OCI specifications ensure that container images and runtimes are compatible with various containerization solutions, reducing vendor lock-in and promoting collaboration within the container ecosystem.
Despite the emergence of OCI standards, Docker remains a dominant force in the containerization space, with a vast community and ecosystem around its tools and services. Docker continues to innovate and evolve its platform to meet the changing needs of developers and organizations while also contributing to the broader container community through initiatives like OCI. As containerization continues to gain traction in software development and deployment, Docker and OCI standards play crucial roles in shaping the future of container technology.
Conclusion
Containers have revolutionized how we develop, package, and deploy applications by providing an isolated, consistent environment that runs seamlessly across various platforms. They rely on container images, which are lightweight packages of software that carry everything an application needs to run—code, runtime, system tools, libraries, and settings—understanding how containers and container images work is fundamental to navigating the evolving landscape of modern software deployment. Containers offer benefits such as scalability, portability, and resource efficiency.
They enable developers to build and test applications locally in a consistent environment before deploying them to production. Container orchestration tools like Kubernetes further enhance the management and scalability of containerized applications, facilitating automation and ensuring reliability. As organizations increasingly adopt microservices architecture and cloud-native technologies, mastering containerization becomes essential for staying competitive and optimizing software development and deployment processes.
Test-driven development (TDD) software development methodology strongly emphasizes building tests before producing actual code. Using this technique, developers can immediately guarantee their code’s caliber and accuracy.
Since TDD has become so widely used in recent years, several tools and approaches have been created to help implement it. We will give an overview of some of the popular TDD tools and methodologies in this article for developers.
The test-writing process comes first in the test-driven development (TDD) product engineering method. Developers can use this method to increase code quality, decrease bugs, and boost confidence in their software.
Various tools and approaches have been developed to make writing, running, and managing tests easier. This article will introduce a few well-liked TDD tools and practices that can improve the TDD workflow and aid programmers in creating stable, dependable software.
Unit testing frameworks:
Unit testing frameworks make writing and running tests at the unit level possible. These frameworks allow developers to specify test cases, prepare data, and claim desired results. Several popular frameworks for unit testing include:
JUnit (Java) is a well-liked framework for Java applications that supports assertions, test reporting, and annotations for test setup and execution.
NUnit (.NET): A framework for unit testing. NET applications provide various testing features for organizing and customizing tests.
PyTest (Python): A versatile and user-friendly testing framework for Python, PyTest (Python) enables test discovery, fixture management, and thorough test reporting.
Tools for mocking and stubbing:
TDD relies on mocking and stubbing tools to isolate individual pieces of code and simulate external dependencies. Developers may create test duplicates with these technologies that behave like natural objects or services. Mocking and stubbing frameworks that are often used include:
Mockito (Java) is a robust mocking framework for Java that makes creating mock objects and validating object interactions easier.
Moq (.NET): This is a versatile mocking framework for .NET that allows for creating mock objects, establishing expectations, and verifying method invocations.
Unittest. Mock (Python): Python’s standard library has a built-in unit test module. Mock offers a mocking framework for producing test duplicates and controlling side effects.
Code coverage tools:
Code coverage tools help determine how well the test suite has covered the codebase. They give developers metrics on the regions of the code that the tests have exercised, allowing them to spot places with insufficient coverage. Several well-liked code coverage instruments are:
Cobertura: is a Java-based code coverage tool that creates reports outlining the lines of code that were run during testing and locating untested code sections.
OpenCover (.NET): The OpenCover (. NET) tool for .NET applications provides detailed code coverage reports with line, branch, and method coverage metrics.
Coverage.py (Python): Python’s coverage.python: PY is a comprehensive code coverage tool that calculates line, branch, and statement coverage and produces reports in several forms.
Continuous Integration (CI) and Build Tools:
Continuous Integration (CI) and build technologies automate the performance of tests and other development chores, ensuring that tests are run often and the product is kept in a functional state. Several frequently employed CI and build tools are:
Jenkins is an open-source CI technology that enables automated build and test pipeline configuration, including test execution, code analysis, and reporting.
Travis CI: This cloud-based continuous integration service interacts with well-known version control systems and launches builds and tests automatically in response to code contributions.
CircleCI: A scalable build and test infrastructure provided by a cloud-based CI/CD platform, CircleCI enables developers to automate the testing process effortlessly.
Test data builders:
Test data builders make the construction of the ice test data structures simpler. They offer a fluid API or a collection of methods for building test objects with pre-set or programmable values. The boilerplate code needed for the test setup is reduced thanks to test data builders, such as Lombok’s @Builder annotation for Java or the Builder pattern in general, which makes it simple to create test objects with little effort.
Test coverage analysis tools:
Test coverage analysis tools shed light on how successful test suites are by showing sections of code that need to be sufficiently covered by tests. These tools aid in locating potential test coverage gaps and direct programmers to create more tests for vital or untested code pathways.
SonarQube, Codecov, and Coveralls are a few tools that evaluate test coverage data and produce reports that can be used to raise the standard of the test suite.
Conclusion:
In conclusion, test-driven development (TDD) is a powerful method for creating software that encourages high-quality, dependable, and maintainable code.
By utilizing the proper tools and methods, developers may improve their TDD workflow and guarantee the success of their testing efforts. Tools for code coverage, CI/build, mocking, and stubbing, as well as unit testing frameworks, are essential for enabling the TDD process.
To fully reap the rewards of this methodology and produce high-quality software products, developers must stay current with the most recent TDD tools and techniques. This is because software development processes are constantly changing.
In cloud systems like AWS and GCP, the use of containers has grown in popularity. Developers can bundle applications and dependencies into a single portable unit with containers.
This unit can be deployed and managed in various settings. This article will cover the advantages of employing containers in cloud settings and tips on using them in AWS and GCP.
Due to their mobility, scalability, and ease of deployment, containers have become popular in cloud settings like AWS (Amazon Web Services) and GCP (Google Cloud Platform).
Services that support containerization are offered by both AWS and GCP, including Amazon Elastic Container Service (ECS), Elastic Kubernetes Service (EKS), and Google Kubernetes Engine (GKE), respectively.
Key Advantages:
Using containers, an application can be packaged into a single, portable unit with all its dependencies and libraries. This simplifies creating, testing, and deploying apps, enabling applications to function consistently across many contexts.
AWS and GCP offer container orchestration solutions, which control container deployment, scaling, and monitoring. AWS ECS and GCP GKE, respectively, manage the lifespan of containers using container orchestration engines like Docker and Kubernetes.
Scalability: Depending on demand, containers can be scaled up or down. With the help of auto-scaling features offered by AWS and GCP, you may change the number of container instances based on resource usage or application KPIs.
Resource Efficiency: Compared to conventional virtual machines, containers are more lightweight and resource-efficient since they use a shared operating system kernel. You can run numerous containers on a single host, optimizing resource usage and cutting costs.
Cloud service integration is simple thanks to containers’ compatibility with other AWS and GCP cloud services. For instance, you can utilize GCP’s Cloud Pub/Sub for event-driven architectures or AWS Lambda to conduct serverless operations triggered by container events.
Containers assist with Continuous Integration and Deployment (CI/CD) workflows by offering a consistent environment for developing, testing, and deploying applications.
For automating CI/CD pipelines, AWS and GCP provide various tools and services, such as AWS CodePipeline and GCP Cloud Build.
Containers facilitate more straightforward deployment across hybrid and multi-cloud setups. Building containerized apps gives you freedom and prevents vendor lock-in. These applications can run on-premises, in AWS, GCP, or other cloud providers.
Employing containers in cloud environments like AWS and GCP offers advantages, including better application portability, scalability, resource efficiency, and easier management through container orchestration systems.
Benefits of Using Containers in Cloud Environments
Portability: Containers offer a stable environment regardless of when stabilization is deployed. This makes switching between cloud service providers or on-premises settings easy.
Scalability: Containers are easily scaleable up or down to accommodate changing demand. As a result, applications may easily and quickly scale up to manage increased workloads or traffic.
Efficiency: Because several containers can execute on a single host machine, containers allow for more effective use of resources. As a result, fewer physical devices are required to operate applications, which can save costs and simplify operations.
Agility: Containers allow developers to test and deploy apps fast, which helps shorten the time to market and accelerate development cycles.
Using AWS in Containers
Amazon Elastic Container Service (ECS), Amazon Elastic Kubernetes Service (EKS), and AWS Fargate are just a few of the services that Amazon Web Services (AWS) provides for running containers.
Amazon ECS: Running and scaling Docker containers is simple with Amazon ECS, a fully-managed container orchestration service.
It offers functions like auto-scaling, load balancing, and service discovery and connects with other AWS services, including Amazon EC2, Elastic Load Balancing, and Amazon CloudWatch.
Amazon EKS: A fully-managed Kubernetes service called Amazon EKS makes it simple to install, control, and grow containerized applications.
It offers functions like auto-scaling, load balancing, and service discovery and connects with other AWS services, including Amazon EC2, Elastic Load Balancing, and Amazon VPC.
AWS Fargate: With AWS Fargate, you can run containers without maintaining servers or clusters. AWS Fargate is a serverless computing engine for containers. It offers a mechanism to grow container operations without concern for the underlying infrastructure.
Using Containers in CGP
Software applications and their dependencies can be packaged in lightweight, portable containers. Applications can run in an isolated environment, making deploying and maintaining them simpler across many platforms and environments.
To package the dependencies your application needs, such as libraries and frameworks, into a self-contained image that can be quickly deployed to various environments, containers can be utilized in CGP development.
This ensures your program operates consistently across many domains, making managing its dependencies easy.
For CGP development, various containerization solutions are available, including Docker, Kubernetes, and Docker Compose. These tools allow you to construct and manage containers and offer networking, scaling, and load-balancing features.
Creating a Dockerfile that details the dependencies needed by your application and how to bundle them into a container image is the traditional first step in using containers in CGP development. The image can then be created and run in a container using Docker.
Overall, containers can be helpful for CGP development since they give you a mechanism to control your application’s dependencies and guarantee reliable performance in various settings.
Key Takeaways
Containers offer a consistent and portable runtime environment. They contain an application and its dependencies, enabling consistent performance across many platforms and environments.
Thanks to its portability, it is simple to migrate between AWS and GCP or even other cloud platforms, which allows simple migration and deployment between cloud providers.
Applications may be easily scaled, thanks to containers. To facilitate auto-scaling and effective resource allocation based on application demands, cloud platforms like AWS and GCP offer orchestration technologies like Amazon Elastic Container Service (ECS), Amazon Elastic Kubernetes Service (EKS), Google Kubernetes Engine (GKE), and Google Cloud Run.
This scalability provides optimal resource utilization while handling variable workload levels.
Applications can run separately and without interfering with one another, thanks to the isolation level provided by containers. This isolation enhances security by lowering the attack surface and limiting the effects of flaws.
Cloud providers include built-in security features, including network isolation, IAM (Identity and Access Management) policies, and encryption choices to improve container security further.
Since containers share the host operating system’s kernel and have a small physical footprint, resources are used effectively. Compared to conventional virtual machines (VMs), you may operate more containers on a single machine, resulting in cost savings.
Cloud providers frequently offer cost-optimization options like reserved instances and spot instances to further reduce the cost of container deployment.
Faster application deployment and upgrades are made possible by containers. Developers may quickly deploy and distribute an application across many environments by compiling it and its dependencies into a container image.
This streamlined deployment procedure makes rapid iteration and continuous delivery possible, improving agility and reducing time-to-market.
In conclusion, Modern software development methodologies like DevOps and CI/CD (Continuous Integration/Continuous Deployment) are ideally suited for container use.
Containers simplify establishing repeatable development environments, automate deployment processes, and guarantee uniform testing across staging and production systems. Numerous DevOps and CI/CD solutions are available from AWS and GCP, and they all work well with containerized applications.
Modern applications and systems rely heavily on databases, a single location for storing and managing data. Database normalization and denormalization are vital ideas that might affect a database system’s effectiveness and scalability.
In product engineering, database normalization and denormalization are crucial ideas that help guarantee data consistency, reduce redundancy, and enhance overall database performance.
This article will cover the foundations of database normalization and denormalization, their advantages, and when to employ them.
Database Normalization
Structuring data in a database to decrease data redundancy and enhance data integrity is known as database normalization. It entails segmenting a larger table into more focused, smaller tables that can be connected via relationships. Eliminating data redundancy and ensuring that each data item is only kept once in the database are the critical goals of normalization.
A database can be in one of several standard forms, each with a unique set of specifications.
The following are the most typical standard forms:
A primary key must be present in each database table, and atomic values must be current in each column for the first standard form (1NF) to be valid (i.e., single, indivisible values).
According to the Second Normal Form (2NF), each non-key column must rely only on the primary key and not other non-key cues.
Third Normal Form (3NF): For this form, each non-key column must be independent of all other non-key columns and only be dependent on the primary key.
Each non-trivial functional dependency in the table must depend on a candidate key to satisfy the Boyce-Codd normal form (BCNF).
Data anomalies, insertion anomalies, and deletion anomalies are prevented via normalization in the database. When data is kept in various locations, update anomalies might emerge. This is an insertion anomaly when data cannot be added to a table without inserting it into another table. While deleting data from one table, deletion anomalies take place, and accidental data loss occurs in other tables.
Normalization’s Advantages
Reducing data redundancy: Redundant data is eliminated by normalization and stored in separate tables, which decreases the amount of storage space needed and improves the efficiency of data updates and searches.
Enhancing data consistency: Normalization ensures that data consistency is improved by storing each piece of data in a single location. Database maintenance is made more accessible by normalization, which allows changes to one table without impacting other tables.
Improving database performance: Enhancing database performance: Normalization can enhance database speed by lowering the quantity of table joins necessary to get data.
Database Denormalization
Denormalization of a database is consciously adding redundancy to enhance performance or streamline the architecture. When dealing with enormous amounts of data or complicated queries, denormalization is frequently utilized when database efficiency is a top priority.
Denormalization is purposefully introducing redundancy into a database for performance reasons. It includes adding redundant data to one or more tables to speed up query execution or simplify complex data queries.
Denormalization is frequently used in large, intricate databases that must frequently retrieve data since the performance benefits often outweigh the drawbacks. Denormalization must be planned and carried out to maintain data consistency and integrity.
For database denormalization, several techniques are employed, including:
Combining tables: Combining tables entails combining two or more tables with comparable data into a single table. Requiring fewer table joins to access data can increase performance.
Adding redundant columns: By adding redundant columns to eliminate the need for joins, data is duplicated across many tables. Requiring fewer table joins to access data can increase performance.
Creating summary tables: Making summary tables entails making pre-aggregated data-containing tables that may be utilized to speed up queries. Reducing the need for costly calculations on massive datasets can enhance performance.
Denormalization can enhance database performance by lowering the quantity of table joins necessary to get data. Yet, it also raises the possibility of data abnormalities and update discrepancies. Denormalization should be utilized carefully, and one should be aware of the associated trade-offs.
Normalization and Denormalization: When to Employ Them?
Both normalization and denormalization are effective management strategies for scaling and database performance. Yet, they must be applied correctly and for the intended purposes.
Normalization is advised for most databases to guarantee data integrity, minimize redundancy, and prevent anomalies. It will benefit databases that will be used for online transaction processing (OLTP) or other applications where data consistency is essential.
Denormalization is advised for databases with high-performance or complex query requirements. It is constructive for databases used for OLAP or other software applications where query efficiency is essential.
Denormalization’s Advantages
Denormalization can offer considerable performance advantages, particularly in extensive, complicated databases with frequently accessed data. Denormalization has the following primary benefits.
Denormalization removes the need for complicated joins, which can significantly enhance query performance and result in faster data retrieval.
Complex data searches can be made simpler by denormalization by lowering the number of tables that need to be connected.
Conclusion
Finally, database normalization and denormalization are crucial ideas in database optimization that significantly impact data organization, storage, and retrieval. Normalization minimizes data redundancy and maintains data integrity by using a set of guidelines known as standard forms. Conversely, denormalization entails consciously adding redundancy to a database to boost performance.
Normalization and denormalization both have advantages and disadvantages. In addition to enhancing data integrity and simplifying database administration, normalization can boost performance by lowering the number of table joins necessary to get data. Denormalization can significantly improve performance by reducing the need for complex joins and streamlining data queries. However, denormalization introduces redundant data, which can result in data inconsistencies and conflicts if poorly planned and implemented.
A database’s particular needs and requirements determine whether to normalize or denormalize. It’s critical to thoroughly consider the advantages and disadvantages of each strategy and select the one that best serves the demands of the database and its users.
The pattern known as CQRS, or Command and Query Responsibility Segregation, divides read from update processes for data storage. CQRS implementation can improve your application’s performance, scalability, and security. By CQRS, a system can be more adaptable over time and is shielded from merge conflicts at the domain level by update orders.
In software architecture, particularly in product engineering, two frequently employed patterns are CQRS (Command Query Responsibility Segregation) and event sourcing. They often work in tandem and have much to offer regarding scalability, adaptability, and maintainability.
Architectural patterns like CQRS (Command Query Responsibility Segregation) and event sourcing have become increasingly prominent in recent years. They are frequently combined to create intricate and scalable software systems. This essay will examine what CQRS and event sourcing are, how they function, and why they are so helpful.
The responsibility for handling read and write activities is divided by the architectural pattern known as CQRS. It suggests having different models for reading and writing data in an application. The read model returns data in a format that the user interface can consume and is optimized for commands.
The same data model is utilized for read-and-write operations in typical applications.
This can cause several issues, including complex system scaling and complex, inefficient searches. By separating the read and write models, CQRS addresses these issues by enabling independent model optimization for each.
Event Sourcing
An architectural design pattern called event sourcing records a system’s status as a series of events. Each event is recorded in an append-only log and symbolizes a change in the system’s state. Replaying the events in the log yields the system’s current state.
Traditional database schema stores the system’s current state in a database and expresses changes to the state as updates to the database. This method has several shortcomings, including restricted scalability and data consistency problems.
Event sourcing solves these problems by storing the system’s state and a list of events. This method can process events concurrently, and data consistency can be preserved by replaying events in the proper sequence.
The state of a software application is derived from a series of events rather than being stored as
Its present state is an event-sourcing approach to software development. It is predicated on the notion that an application’s shape can be restored by replaying the sequence of actions that resulted in the state.
Every change to the application’s state is recorded in an event-sourced system as a series of immutable events, each denoting a state change.
These events are stored in an event log or event store, which serves as the only reliable source for the system’s status.
An application that needs to know its current state receives the events from the event log applies them sequentially to an empty form, and then reconstructs the system’s current state. This enables capabilities like time-travel debugging and auditing and makes it simple to track how the systems got to their current state.
The Command Query Responsibility Segregation (CQRS) architecture, where the write and read models are separated to give scalability and performance advantages, is frequently used with event sourcing.
Event sourcing has grown in popularity recently, especially for complex systems and those with strict auditing and compliance needs. It can offer a reliable method of maintaining the application state.
CQRS and Event Sourcing in Sync
Complex and scalable systems are frequently constructed using a combination of CQRS and event sourcing. With event sourcing, the write model in a CQRS architecture can be realized, With each command producing an event that symbolizes a change in the system’s state. Replying to these events will reveal the system’s current state, which is maintained in an append-only log.
Replaying the events will reveal the system’s current status from an append-only log.
It is possible to implement the read model in a CQRS architecture utilizing a separate, query-optimized database. This database can be filled by reading the occurrences from the event log and projecting them into a format that can be queried.
The two distinct patterns of CQRS (Command Query Responsibility Segregation) and
Event sourcing can be used to build scalable and effective systems.
A pattern called CQRS divides the duties of reading and writing data. This implies that handling instruction (write operations) and inquiries follow different processes (read procedures). The system can be optimized for each sort of operation by diving these systems where there are more read activities than write operations.
On the other hand, the patterns known as “Event Sourcing” records all state changes in an application as a series of events. The sequence of events can be used to rebuild the application’s state at any time because each event reflects a particular change to its state. Event sourcing can be beneficial in systems where audibility and traceability are crucial.
CQRS and event sourcing can offer a complete set of advantages.
CQRS can improve query performance by separating the read and write pathways. Event Sourcing can provide a comprehensive history of all changes to the application’s state.
Debugging, auditing, and testing can all benefit from this.
Event sourcing can also serve as a source of truth for the system’s status. The system can be made resilient to failures and quickly recoverable in the case of a system outage by capturing all state changes as a series of events.
Benefits of CQRS and Event Training
Some advantages of CQRS and event sourcing include the following:
Adaptability: CQRS enables a more scalable system to manage large volumes of data by separating read-write models and employing even sourcing.
Data Integrity: Event sourcing maintains data consistency by storing the system’s state as a series of events. These events can be adequately replayed to determine the system’s present condition.
Agility: The system’s design is flexible, thanks to CQRS and event sourcing. The system can be expanded to meet new requirements, and the read-and-write models can be optimized separately.
Outcome
Powerful architectural patterns that offer scalability, data integrity, and flexibility include CQRS and event sourcing. CQRS and Event Sourcing make it possible to construct intricate, scalable systems that deal with large amounts of data by diving read and write models and storing the system’s state as a series of events.
In conclusion, the architectural patterns of CQRS (Command Query Responsibility Segregation) and Event Sourcing can be combined to create scalable, resilient, and adaptable software systems.
By developing different data models for each operation, CQRS includes dividing a system’s read and write activities. This makes better performance, scalability, and flexibility in handling complicated domain logic possible. On the other hand, event sourcing entails keeping a log of modifications made to the system’s state as a series of events. This offers a historical perspective of the system’s status and simplifies auditing and debugging.
Building complicated systems that can handle copious quantities of data, scale horizontally, and offer a flexible and adaptive architecture requires using CQRS and Event Sourcing together. They also need rigorous planning and design to implement them appropriately and successfully. It’s critical to thoroughly understand the domain, the issue you’re attempting to solve, and the trade-offs and difficulties associated with implementing these patterns.
Have you ever modified your code that you later regretted doing or unintentionally deleted a necessary file? Do not be alarmed; we have all been there. But what if we told you there was a tool you could use to keep track of all your code changes and prevent these errors?
Let’s introduce Git, the version control system sweeping the globe. Git may have a humorous name for a tool, but don’t be fooled—it’s a severe program. Git will ensure you never again lose your work or make mistakes that cannot be undone.
You can keep track of what modifications were made, by whom, and when you are working on a project over time. If your code has a flaw, this becomes much more crucial! Git can be of assistance with this.
Code change management is essential in the realm of software development. Keeping track of changes made to the code is crucial for maintaining a stable, functional end product, whether a team of developers is working on a project or a single developer is working on a personal project.
In this situation, version control systems come into play, and Git is one of the most well-liked and commonly utilized.
Software developers and product engineers manage changes to their codebase over time using the well-liked version control system Git. It enables team cooperation and coordination by allowing numerous developers to work on the same codebase concurrently while keeping track of the changes made by each developer.
What is Version Control?
Developers can track changes made to code over time using a method called version control. It offers a way to control and plan code as it develops and improves. Using version control systems, developers can collaborate on a project while allowing different team members to work independently on the same codebase.
It is possible to use centralized, distributed, or hybrid version control systems, among other variations. In centralized version control systems, developers check out and check in code to a server, which stores all changes on a single computer. Conversely, distributed version control solutions enable developers to keep a copy of the code repository on their local machine, facilitating offline work and lowering the likelihood of server failure.
What are the Benefits of Using Version Control?
When you have a GitHub repository, keeping track of the group and individual projects is simple. As the projects advance, everyone may upload their code, graphs, and other materials, and all the files required for specific analysis can be kept together.
Each file on GitHub has a history, making it simple to study its modifications over time. You can examine others’ code, comment on specific lines or the entire document, and suggest changes.
GitHub lets you assign tasks to various users for collaborative projects so that it is apparent who is in charge of what aspect of the analysis. You may also request code reviews from specific users. Version control allows you to maintain track of your projects.
Software solutions called version control systems (VCS) keep track of changes made to code or any other digital asset over time. The following are some advantages of version control:
Collaboration is made possible through version control, which enables multiple individuals to work simultaneously on a project without interfering with one another’s efforts. Using the version control system, each person can work on their copy of the code and then combine their modifications.
Version control systems record every modification to a project, including who made it, when it was modified, and what was changed. This makes it simple to find flaws and, if required, roll back to an earlier version.
Version control systems enable developers to establish branches or distinct versions of the code to experiment or work on new features without affecting the primary codebase. When ready, these branches can be merged back into the primary codebase.
Version control systems offer a code backup in case of a system failure or data loss. This may lessen the likelihood of a disastrous loss of effort and data.
To enable code review, where other developers can examine and offer feedback on changes made to the code, version control systems can be utilized.
Version control systems offer traceability, connecting changes to code to particular problems or errors. This aids developers in comprehending the context and rationale for a change.
What is Git?
Git is a distributed version control system created to manage every project quickly and effectively, whether big or small. Linus Torvalds founded it in 2005 to oversee the development of the Linux kernel. Millions of developers now use Git to manage code and collaborate on projects.
Git gives programmers a mechanism to manage several versions of their code and keep track of changes to their codebase. Developers can use Git to construct branches, which are distinct lines of development that can be worked on separately before being merged into the central unit. This makes it simple to test out new features or changes without affecting the primary codebase.
Git also includes a robust collection of tools for resolving disputes that could occur when several developers work on the same code and merge changes from several branches. These tools make it simple to work together on projects and guarantee that everyone is using the most recent code.
Using Git for Version Control
Developers create a repository, a directory that houses the code and its history, as the first step in using Git for version control. After that, they upload files to the repository and commit updates as they happen. Every commit is a snapshot of the code at that specific moment.
Git offers a means of tracking code alterations over time. Developers can view a repository’s history and see all the modifications made. If necessary, they can also return to earlier iterations of the code.
Conclusion
Git is a crucial tool for managing changes to code, and version control is a vital component of software development. With Git, developers can easily collaborate on projects, maintain multiple versions of their code, and track changes to their code.
Working with other developers and ensuring that everyone uses the most recent version of the code is simple because of Git’s robust collection of conflict resolution and merging mechanisms. Git is a crucial tool for maintaining your code and ensuring that your projects are successful, whether you work alone or with a massive team of developers.
Do you ever think you’re playing hide-and-seek with your code? Your application crashes, and you spend hours scouring your screen for that elusive issue. Nothing appears to work no matter what you do.
Let us suggest some debugging tools to help you write code more effectively and make identifying and eliminating bugs easier.
The process of debugging software is crucial. It assists you with finding and fixing errors in your code, assuring the efficient operation of your application. Using debugging tools can significantly enhance your code in your product engineering efforts.
However, debugging may be difficult, especially when working with complicated software projects. You must have the appropriate debugging tools to complete the task quickly.
Finding the source of an issue in a code base and fixing it is called debugging.
Typically, we brainstorm all potential causes before testing each one (beginning with the most likely ones) to identify the true root of the problem. Once we have corrected it, we ensure it won’t happen again.
There isn’t a magic bullet for bugs. Searching online, recording our code, and comparing our logic to what is happening are typically required.
We’ll discuss the value of debugging, typical bug kinds, and the most widely used debugging tools on the market.
Why Is Debugging Important?
Software development requires extensive debugging, which is crucial for several reasons. First, it assists you in locating and correcting programming mistakes, which may be logical, runtime, or syntax-related. If you don’t debug it first, you risk publishing software with flaws that could cause your program to crash, yield unexpected results, or jeopardize data security.
Debugging also aids in code optimization by highlighting problem areas. By studying your code when debugging, you can find performance bottlenecks, unnecessary code, or places where you can modify algorithms to increase application speed and responsiveness.
We use information when working as developers. We arrange it, transfer it, modify it, transmit it to different locations, and then receive it once more.
We frequently work with information, though not directly. At least not in the way users imagine it; knowledge isn’t “actually” present in computers.
The computer only contains electric pulses, which are abstracted into 1s and 0s and then returned to the information we are working with.
We utilize programming languages to communicate with and use computers. These give us representations of the information we manage and various degrees of abstraction from the computer’s tasks.
When programming, it’s pretty simple to lose track of the actual operation quickly the computer is carrying out or the data we are operating upon in a given line of code because it may be such an abstract activity. From then on, it’s simple to train the computer incorrectly and miss our goal.
According to an inside joke in software development, developers often spend 5 minutes developing code and 5 hours attempting to comprehend why something doesn’t work as it should.
No matter how competent we become as developers, we will still have to spend countless hours fixing bugs in our code; thus, we should improve our debugging skills.
Finally, debugging enhances the quality of your code, which helps you create better software. Debugging enables you to develop better code by educating you on typical errors and excellent practices. You can use the new debugging methods, tools, and procedures you learn to hone your coding abilities.
Types of Bugs
Runtime errors—Syntax errors are errors caused by incorrect syntax. They may stop the code from correctly compiling or running.
Syntax errors—Runtime errors occur while the code is executed. They may result from various problems, including invalid input or division by zero.
Logical errors – Errors caused by flawed software logic are known as logical errors. They may lead to unpredictable behavior or inaccurate output.
Memory leaks happen when a program forgets to free memory after it has served its purpose, which lowers system performance.
Debugging Tools
Now that you know the value of debugging and the many errors you could meet, let’s examine some of the most well-liked debugging tools.
Integrated Development Environments (IDEs)
Integrated Development Environments (IDEs) are well-liked debugging tools that give developers access to an integrated debugging environment. Breakpoints, watch variables, and call stacks are just a few of the debugging tools available in IDEs to assist you in successfully analyzing and troubleshooting your code. Xcode, Eclipse, and Visual Studio are a few well-known IDEs.
Debuggers
Developers can track how their code is being executed using debuggers, which are standalone tools. They include sophisticated features like breakpoints, memory analysis, and call tracing. Various programming languages, including C++, Java, and Python, have debuggers available.
Logging Programs
Logging libraries are helpful debugging tools that allow programmers to record messages while their code runs. Developers can now examine the output to find problems and enhance performance. Log4j, Logback, and NLog are well-known logging libraries that are performance profilers.
Performance Profilers
Developers can locate performance bottlenecks in their code using performance profilers. They examine how code is executed to pinpoint the time-consuming procedures and give developers the tools to optimize their code. Some popular performance profilers include VisualVM, YourKit, and Intel VTune.
Conclusion
Software development must include debugging, and using the appropriate tools is crucial to enhancing effectiveness. By using debugging tools like IDEs, debuggers, logging libraries, and performance profilers, you can find and fix problems in your code more quickly, optimize your code, and advance your coding abilities.
We have compiled a list of the top 10 essential developer tools that will change how you work. This article will arm you with all the tools you need to achieve optimum efficiency in your development process, from code editors to productivity enhancers.
Depending on the particular requirements and technologies employed, various developer tools can be used to enhance the effectiveness of product engineering workflows.
Developers are constantly seeking methods to boost productivity and optimize their processes. Given the wide variety of available development tools, it can be challenging to decide which are needed.
Ten essential developer tools for productive workflow are listed below:
1) Git Hub:
If you’re a developer, you may have heard of GitHub before. However, if you haven’t, here’s the gist: it essentially functions as a platform for hosting and disseminating code.
“Okay, but why can’t I just store my code on my computer or a shared drive somewhere?” you might be asking. Of course, you could do that. However, there are a few reasons why utilizing GitHub is preferable.
It facilitates teamwork. Imagine you are collaborating with a group of developers on a project. Everyone can contribute to the codebase and make modifications using GitHub. You can return to a previous code version if someone makes a mistake.
As a web developer, it may be an excellent platform for growing your contacts and brand. Additionally, it includes versatile project management tools that make it easier for businesses to accommodate any team, project, or workflow.
GitHub offers a free subscription with 500 MB of storage space, unlimited repositories, and collaborators.
You must buy one of GitHub’s subscription plans to utilize its other capabilities, such as sophisticated auditing and access to GitHub Codespaces.
Key Points:
Based on your coding style, an AI-driven tool that proposes code completions and functions. Furthermore, it automates repetitive code and makes unit testing possible for your projects.
It includes a text editor, bug tracking software, Git commands, and everything else you need to create a repository. It is also reachable using other browser-based editors like Visual Studio Code.
You can designate up to 10 users on GitHub to work on a particular issue or pull request. This helps make managing the development of a project easier.
Set varying levels of account and resource access and permissions for various contributors.
You can use GitHub to automate testing, CI/CD, project management, and onboarding processes.
To expand GitHub’s functionality, use various third-party web apps offered on the GitHub Marketplace. Numerous integrations, including Stale, Zenhub, and Azure Pipelines, are available only to GitHub users.
The iOS and Android versions of the GitHub mobile app allow users to manage their projects while on the go.
GitHub has a code scanning tool to find security holes and a security audit record to monitor team members’ activity. It is also SOC 1 and SOC 2 compliant.
2) Stack Overflow
Stack Overflow is a well-known online forum for programmers to ask and respond to technical concerns about software development. Joel Spolsky and Jeff Atwood started it in 2008, and it has grown to be one of the most popular sites for developers.
Users can register for a free account on Stack Overflow and post questions about software development and coding. Other users can then answer these queries, and the original poster can select the best response as the recommended course of action.
Stack Overflow features a community-driven moderation system in addition to the Q&A style. Users can report objectionable content or offer site improvement recommendations.
Stack Overflow answers your queries and can help you become a better developer. When you browse the questions and answerers, you’re not simply seeking an immediate solution to a coding issue.
You may also be exposed to new programming concepts and techniques you have yet to encounter. As a result, your skill set may be widened, and you may become a better developer overall.
There is also a reputation system on the platform, where members can accrue points for their contributions to the
Stack Overflow is a website for questions and answers. Developers from all over the world congregate here to assist one another. You can ask a question, and both inexperienced and seasoned engineers will respond in minutes. The website is built with a community-driven model in mind. Users may vote for or against responses based on their usefulness and relevancy.
One of Stack Overflow’s most robust features is that it covers a wide variety of programming languages, frameworks, and tools. Therefore, regardless of your work, you’ll find the solution.
In conclusion, Stack Overflow has become a crucial tool for developers worldwide, offering a sizable knowledge base and a vibrant community of specialists to assist with even the most challenging programming problems.
3) Postman
Do you know what an API is? They function as remote connections that allow various apps and services to communicate with one another. Today, many businesses use APIs to create their applications, which is why API platforms have become crucial.
Postman is one of the most well-liked API solutions for interacting with APIs.
With Postman, you can quickly design and execute sophisticated API calls. The best thing, though, is that the response is immediately shown in the same view! There’s no need to switch between various tools or create complex code.
That’s not all, though. In Postman, you can quickly change settings to observe how the API responds to multiple inputs. You can alter different headers and parameters to observe how the API responds.
A well-liked API development tool called Postman makes it simple for programmers to create, test, and document APIs. Developers can send HTTP queries to an API and receive responses through its user-friendly interface, which helps them better understand how the API functions and how to incorporate it into their applications.
With Postman, developers can add headers, query parameters, request bodies, and other parameters to their HTTP requests. Postman supports several HTTP request types, including GET, POST, PUT, PATCH, and DELETE. Additionally, it has tools for building mock servers, setting up collections of API requests, and producing documentation.
Postman offers a desktop program for Windows, macOS, and Linux and a web-based application. It is regarded as one of the most potent API creation and testing tools and is used by millions of developers worldwide.
Additionally, Postman offers model code examples for various languages. As a result, it is simple to include the APIs you test on it into your application’s code.
If you work with APIs, you must check out Postman. It’s like having a magic wand that instantly and easily makes API testing easy.
4) Docker:
Docker program enables you to create, distribute, and run applications inside containers. You ask, “What is a container?” Imagine it as a box that contains the application code, libraries, and dependencies necessary to run your program.
Why should you utilize Docker? Well, there are a lot of them! Portability is the primary justification. Without worrying about compatibility issues, you can move an application built as a container from your local laptop to a production server.
Developers may package, distribute, and operate applications in a containerized environment using Docker software. Containers are small, standalone executable packages with all the components—code, libraries, system tools, and settings—necessary to run a program. Docker enables developers to quickly and easily build, test, and deploy apps without worrying about supporting infrastructure or backward compatibility.
Docker’s unified approach to application packaging and distribution simplifies application deployment across several environments, such as development, testing, staging, and production. In addition, Docker offers tools for monitoring, load balancing, and scaling containers.
Due to its capacity to streamline application deployment and management, Docker has grown in popularity recently, especially in cloud-based contexts. It is frequently used in DevOps workflows, where development and operations teams collaborate to swiftly and reliably build and deploy apps.
5) Slack:
Teams can connect and work more effectively thanks to Slack’s cloud-based collaboration tool. It is a well-liked solution for remote teams and businesses of all kinds since it provides a variety of capabilities like chat, file sharing, video conferencing, and app integration.
Slack users can set up channels for specific projects, teams, or themes where they can share files, messages, and other crucial information. Additionally, it provides voice and video calls for in-context collaboration and direct messaging for one-on-one communications.
Slack’s ability to link with other programs and services, such as Google Drive, Trello, and Salesforce, makes it a hub for your team’s activity. This is one of its key benefits. Slack also provides several security measures, such as data encryption and two-factor authentication, to guarantee your team’s communication, data safety, and security.
Slack also connects with other widely used products, such as Google Drive and Office 365. As a result, you don’t constantly need to navigate between multiple apps to share files and documents with your colleagues.
One of Slack’s most powerful features is its ability to automate routine and repetitive tasks. Workflows are a tool that can speed up any process, from gathering feedback on a project to onboarding new staff.
Slack can help you accomplish more in less time, is simple to use, and interacts with other technologies you already use.
6) Code Editor:
A software program called a code editor creates and edits source code. It offers programmers an easy-to-use interface for writing and editing code in various programming languages, including JavaScript, Python, and others. A code editor frequently includes syntax highlighting, code completion, debugging, and code formatting.
These tools can make coding more effective and less error-prone for developers. Sublime Text, Atom, Visual Studio Code, and Notepad++ are a few of the most well-known code editors.
The feature sets offered by various code editors vary. However, many come with auto-completion and syntax highlighting right out of the box. Thanks to syntax highlighting, it is simpler to discern between different sections of your code visually.
Additionally, you can save time by letting the editor suggest and finish code snippets for you as you type by using auto-completion. Further, some editors allow you to personalize and expand their functionality by installing various extensions or plugins.
Each code editor has advantages and disadvantages, and many of them are accessible. Visual Studio Code, Notepad++, Vim, and Sublime Text are a few of the more well-liked choices. These editors can be used in various programming languages and are flexible.
7) Sass:
Preprocessor scripting languages such as Sass (short for “Syntactically Awesome Style Sheets”) are employed to create CSS stylesheets. Hampton Catlin created it, and Natalie Weizenbaum later refined it. By introducing programming ideas like variables, mixins, functions, and nesting, Sass offers a way to create CSS code that is more readable, maintainable, and modular.
The syntax used to write Sass code differs from that of CSS. This syntax includes features like nesting, which enables you to write more readable and concise code by concatenating related selectors and properties, and variables, which lets you store and reuse values throughout your stylesheet.
Sass can be converted into standard CSS using a command-line tool or a program that integrates with your development environment. Like any other CSS file, this produced CSS can be utilized in your web application.
Because it allows you to alter colors, fonts, and other user interface components, this web development tool is also excellent for learning how to create websites. Sass also makes sharing designs within and between projects simple, which simplifies project management.
Key Points:
Integrated frameworks: Access effective authoring frameworks like Compass, Susy, and Bourbon quickly.
Beginner-friendly. This web development tool is simple to set up and doesn’t require any training.
Outstanding standing and broad public backing. Leading tech businesses frequently employ Saas. It also has a sizable user base and quick support for fixing bugs and issuing updates.
LibSass implements Saas in C/C++ to facilitate simple language integration.
8) Bootstrap:
To estimate the sampling distribution of a statistic, the term “bootstrap” in statistics refers to a resampling procedure that includes repeatedly sampling a dataset. By randomly selecting data from the original dataset and replacing it, the bootstrap approach produces several datasets.
Statistics of interest are then computed on each of these resampled datasets, and the distribution of these statistics is used to calculate the uncertainty in the initial estimate.
In cases where conventional analytical techniques are unavailable, the bootstrap can estimate confidence intervals, standard errors, and other statistical metrics for complex models or data sets. In machine learning and data science, it is frequently used for model selection, parameter tuning, and assessing the robustness of model predictions.
A popular front-end programming framework for building responsive web applications is Bootstrap.
Web developers will save a ton of time by not having to manually code the numerous HTML, CSS, and JavaScript-based scripts for web design elements and functionality.
Anyone with a working knowledge of HTML, CSS, and JavaScript can readily navigate Bootstrap. Creating themes for well-known CMSs like WordPress is another way to learn Bootstrap.
9) Kubernetes:
The deployment, scaling, and maintenance of containerized applications can all be automated using the open-source container orchestration technology known as Kubernetes (sometimes referred to as “K8s”). The Cloud Native Computing Foundation (CNCF), which developed it at first, is now responsible for its upkeep.
Kubernetes offers a highly scalable, fault-tolerant solution to oversee containerized workloads over many nodes. Deploying and managing containerized applications are simplified by automating scheduling, scaling, and self-healing processes.
Developers can concentrate on building code without thinking about the underlying infrastructure using Kubernetes, while operations teams can easily manage extensive container deployments.
Kubernetes’s support for a variety of container runtimes, such as Docker, containers, and CRI-O, makes it a flexible platform for managing containers.
Key Points:
Kubernetes may operate on various infrastructures, including public, private, and hybrid clouds and on-premises data centers.
Sensitive information, including authentication tokens, SSH keys, and passwords, is stored in Kubernetes Secrets. Additionally, it enables users to create and update secrets without having to recreate container images or expose secrets in stack configurations.
Automated scaling of each container based on specified metrics and available resources.
Containers with their own DNS names and IP addresses are immediately exposed. This prevents stability during traffic surges and allows load balancing.
Your apps are given a health check by Kubernetes to identify any potential problems.
To reduce latency and enhance user experience, it mounts the storage system of your choice.
The capacity to cure itself. Monitor and replace unhealthy containers to improve the performance of your apps.
10) Angular:
The front-end web development application framework Angular can be used to create single-page applications (SPAs), advanced web applications (PWAs), and substantial enterprise apps.
It aids web developers in writing more precise, more consistent code because it is written in Typescript.
Web designers may swiftly create dynamic web apps thanks to their extensive selection of UI components. Additionally, it has a two-way data binding feature that enables users to change the data used by the application through the user interface.
Angular is a framework combining business logic with UI while operating well with some back-end languages.
Key Points:
Enhances HTML and CSS functionality to create dynamic online applications.
The well-organized modules and components of the framework make doing unit tests simple.
Encourage the use of progressive web apps (PWA). Angular-based web applications are compatible with both the Android and iOS platforms.
Enables unique behavior for the app, reducing the danger of potential mistakes.
The developer’s task is made more accessible with Angular CLI, which offers a variety of practical coding tools. To address complicated software difficulties, users can also incorporate third-party libraries.
Reduces the amount of resources required by offering an efficient means of data sharing.
You can immediately access intelligent code completion, in-line error checking, and feedback from your choice of code editor or IDE.
Injection of dependencies (DI) This functionality divides an application into a collection of components that can be used as dependencies on one another.
Final Thoughts
In summary, several essential developer tools can significantly increase the effectiveness of a developer’s workflow. These include debugging tools, a package manager, a task runner, a code editor, and a version control system. By offering functions like syntax highlighting, auto-completion, and code navigation, a practical code editor can reduce time spent on repetitive tasks and boost productivity.
Git and other version control programs allow collaboration with other developers while keeping track of changes. Package managers make dependency management and program updating simple. While debugging tools assist in quickly identifying and resolving errors, task runners automate repetitive tasks like building and testing. These technologies let engineers work more productively and efficiently, which leads to better code and shorter development cycles.
Web development tools are required to simplify front-end and back-end development workflows. Depending on your budget and project scope, the devices you use may impact the success and efficiency of your project.
Code or text editors, version control systems (VCS), web frameworks, debuggers, libraries, prototyping tools, and container software are only a few examples of these tools’ many different configurations.
In recent years Containerization has revolutionized how developers deploy and maintain apps. Applications can be packaged in containers, making them portable and easy to move between environments. Scaling up container management can be challenging, mainly dealing with many hosts and thousands of containers. Kubernetes enters the picture in this situation.
Managing containers using Kubernetes has become a crucial competency for DevOps teams in product engineering. The deployment, scaling, and maintenance of containerized applications are all automated via the open-source container orchestration technology known as Kubernetes.
A thorough manual that leads you through the Kubernetes container management process is “Managing Containers with Kubernetes: A Step-by-Step Guide.” Thanks to the open-source technology Kubernetes, which automates container orchestration, it is simpler to deploy, scale, and maintain containerized apps.
The manual offers a step-by-step procedure for using Kubernetes to manage containers, covering everything from setting up a cluster to deploying, scaling, and updating applications. Additionally, it discusses some of Kubernetes’s fundamental ideas and elements, including pods, services, deployments, and namespaces.
The deployment, scaling, and administration of containers may all be automated using the open-source Kubernetes framework in software development. Automatic load balancing, scalability, and self-healing capabilities are some of its robust management features. The management of containers using Kubernetes will be covered step-by-step in this article.
Step-1 Install Kubernetes
Installing Kubernetes is the first step in managing containers with it. It can be installed on various platforms, including on-premises, in the public cloud, and in the private cloud. The installation procedure varies based on the forum, although each platform’s specific installation instructions are provided on the Kubernetes website.
Step- 2 Create a Kubernetes Cluster
The next step is to construct a Kubernetes cluster after Kubernetes has been installed. A group of computers or nodes running containerized apps together forms a Kubernetes set. In the master-slave architecture used by Kubernetes, the controller node oversees the collection while the agent nodes execute the applications.
To construct a Kubernetes cluster, you must specify the cluster configuration, which includes the number of nodes, their roles, and their resources. A configuration file or graphical user interface can be used for this.
Step- 3 Deploy Applications
With the Kubernetes cluster up and running, the next step is to deploy applications. Kubernetes uses a declarative approach to application deployment, which means that you define the desired state of the application, and Kubernetes takes care of the rest.
To deploy an application, you need to create a deployment object, which defines the application’s container image, resources, and desired replicas. Kubernetes will automatically start and manage the required containers and ensure they run correctly.
Step- 4 Scale Application
One of Kubernetes’s main advantages is its ability to scale applications autonomously. Kubernetes can scale an application’s replica count based on CPU consumption and network traffic metrics.
It would help if you changed the replica count of the deployment object to scale an application. To match the specified replica count, Kubernetes automatically creates or deletes containers.
Step- 5 Manage Stateful Application
Stateful applications are those that require permanent storage, like databases. Kubernetes offers stateful sets, persistent volumes, and other management capabilities for stateful applications.
Although stateful sets are made for stateful applications, they are comparable to deployments. For stateful applications, they offer guarantees for the sequence and uniqueness of pod names.
Containers can get persistent storage with persistent volumes. Any pod in the cluster can use them, which can be generated dynamically or statically.
Step- 6 Monitor the Application
Monitoring is crucial to guarantee the functionality and performance of apps running within a Kubernetes cluster. Applications can be monitored with a set of tools Kubernetes provides, including internal metrics and third-party monitoring tools.
The health and performance of the cluster and its constituent parts are disclosed via the Kubernetes metrics, which are accessible via an API. Using the Prometheus operator, Kubernetes can be connected to external monitoring software.
Step- 7 Upgrade Application
Finally, Kubernetes offers a method for upgrading apps without service interruption. By updating one replica at a time, Kubernetes uses a rolling update technique to ensure the application is always accessible.
To upgrade an application, you must change the deployment object’s container image. The old containers will then be progressively replaced by new ones that Kubernetes has created using the revised image.
Conclusion
Anyone working with containerized apps must know how to manage containers with Kubernetes. Kubernetes offers a robust and adaptable platform for managing, scaling, and deploying containerized applications.
We have covered the fundamentals of Kubernetes in this step-by-step tutorial, including how to set up a cluster, make and manage containers, and scale applications. We have also looked into Kubernetes’ more sophisticated features, including configuring networking and storage and building stateful apps.
After reading this article, you should understand how to manage containers using Kubernetes. Learn more about Kubernetes, a sophisticated system with cutting-edge capabilities. To become a Kubernetes expert, we urge you to keep perusing the documentation for Kubernetes and experimenting with its various capabilities.
The open-source container orchestration platform Kubernetes, called K8s, is made to automate containerized application deployment, scaling, and management.
To make the process of deploying and administering containerized apps in a cluster environment simpler, it is frequently utilized by developers and DevOps teams.
Organizations may deploy, manage, and scale containerized applications using Kubernetes, an open-source container orchestration platform in product engineering. It offers a platform-independent method of managing containers and automating the deployment, scaling, and administration.
The platform is swiftly gaining popularity because it makes application and service deployment simple, allowing businesses to grow quicker and spend less on infrastructure. However, learning how to use Kubernetes might be challenging for beginners. This post provides an overview of Kubernetes, its advantages, and the fundamental ideas you should understand to get started. We’ll briefly introduce Kubernetes in this article and walk you through the process of getting started.
What is Kubernetes?
A platform for container orchestration called Kubernetes offers several features and tools for managing, deploying, and scaling containerized applications.
After Google initially built it, the Cloud Native Computing Foundation (CNCF) now maintains it. Various container runtimes, including Docker, containers, and CRI-O, are compatible with Kubernetes.
With Kubernetes, you may specify the intended state of your application using YAML files, and Kubernetes will ensure that the application is operating in that state automatically.
This is known as a declarative approach to application deployment. Additionally, it gives you access to a set of APIs that you may use to communicate with the cluster and automate processes like scaling, rolling updates, and load balancing.
Kubernetes Architecture
Kubernetes is a distributed system comprising several interconnected components that manage containers.
Two broad categories make up the Kubernetes architecture:
Master Components: The Kubernetes cluster is managed by the master components. They consist of the following elements:
Kubernetes’ central administration hub is the API Server. It makes the Kubernetes API available, which other parts utilize to communicate with the cluster.
The cluster’s state is kept in etcd, a distributed key-value store.
The controller manager keeps the cluster in the intended state, ensuring the correct number of replicas are active.
The scheduler must schedule pods based on resource limits and other factors to run on the appropriate nodes.
Node Components: The node components manage containers and run on each worker node. They consist of the following elements:
The principal agent for managing containers runs on each node, Kubelet. TIt talks with the API server to get instructions on which containers to launch,
Its job is to direct network traffic to the proper container through the Kube proxy.
Runtime for Containers: This program is in charge of operating containers like CRI-O or Docker.
Concepts of Kubernetes
It’s fundamental to comprehend specific basic ideas before getting into Kubernetes.
Pods: A pod is Kubernetes’ smallest deployment unit. In a cluster, it represents a single instance of an active process. One or more containers with the same network namespace and local host support can be found inside a pod.
ReplicaSets: These are in charge of ensuring that a predetermined number of pod replicas are always active. The ReplicaSet will create a new pod to take its place if a pod fails.
Resources: For a group of pods, services give a consistent IP address and DNS name. It allows the pods to communicate with one another and with outside services while serving as a load balancer for them.
Deployment: ReplicaSet scaling and deployment are managed through deployments. To keep the cluster in the appropriate state, Kubernetes will automatically collect the formation, scaling, and deletion of ReplicaSets. It offers a declarative mechanism to declare the cluster’s desire to escape.
Getting Started with Kubernetes
You must build a Kubernetes cluster. Your containerized applications are executed on individual servers. You can create a Kubernetes cluster locally. Alternatively, you can utilize cloud services like Google Cloud, AWS, or Azure.
After setting up a Kubernetes cluster, you can deploy your containerized applications to the group. To manage your applications, Kubernetes uses a variety of objects, including pods, deployments, services, and ingresses.
The minor deployable units in Kubernetes are called pods, and each pod corresponds to one instance of your application. Each pod runs the actual instances of your application in one or more containers. The lifecycle of your pods is managed through deployments, which include scaling up or down, rolling updates, and rollbacks.
Services give your pods a consistent IP address and DNS name so that other services can access them. Ingresses make your services accessible to the public, enabling outside traffic to access your application.
You must produce YAML files detailing your application and its dependencies to deploy it to Kubernetes. Definitions for your pods, deployments, services, and ingresses should be included in these files. Once your YAML files are ready, you can deploy them to your Kubernetes cluster using the kubectl command-line tool.
The primary tool for interacting with Kubernetes clusters is Kubectl. It offers a selection of commands for managing the cluster’s items, including adding, modifying, and deleting them. Use Kubectl to scale up or down your deployment, examine the status of your pods, and deploy your application, among other things.
Conclusion:
AA’s powerful platform for managing containerized applications is Kubernetes. It offers a selection of features and tools to make it easier to manage, scale, and deploy your applications in a cluster environment. Although learning Kubernetes might be complicated for beginners, it is worth the effort because it can make administering your applications much more straightforward.
This article explained how Kubernetes works and walked you through the installation process in product engineering. Following these instructions, you can create a Kubernetes cluster and deploy your containerized applications to the group. You can master using Kubernetes to manage your applications and benefit from its many advantages with some practice.
Kubernetes networking is an essential aspect of Kubernetes architecture and enables communication between the various components of a Kubernetes cluster. It provides a way for containers running on different nodes to communicate, for services to discover and communicate with each other, and for external traffic to be routed to services running within the cluster.
Kubernetes networking provides a highly scalable and reliable network infrastructure that enables the communication between pods, services, and external traffic in your product engineering efforts.
This blog will discuss how to configure services and ingress in Kubernetes.
What is Kubernetes?
Kubernetes is an open-source container orchestration platform designed to automate containerized applications’ deployment, scaling, and management.
It lets developers package their applications and dependencies into containers, which can be easily deployed and run on any Kubernetes-compatible infrastructure.
Kubernetes Services
A Kubernetes service can be defined as a group of pods. It is an abstraction on top of the pod that provides a stable IP address and DNS name for pod access.
It helps pods scale significantly, and the load balancer is easy. It allows clients to access the pods without knowing their IP addresses. Services can be defined in Kubernetes using the YAML or JSON format.
To create a service in Kubernetes, you need to define the following fields:
apiVersion: This specifies the Kubernetes API version. The current version is v1.
Kind: This specifies the resource type. For a service, the style is Service.
Metadata: This field contains metadata about the Service, such as names, labels, and annotations.
Spec: This field defines the specifications for the Service, such as the type of Service, selector, and port mappings.
Example of configuring a service:
In this example, we are creating a service named my-service that will route traffic to pods labeled with the app my-app. The Service exposes port 80 and routes traffic to container port 8080.
Service Types
Kubernetes supports four types of services:
ClusterIP: This is the default service type. It provides a stable IP address and DNS name for capsules within the cluster. This type of service is used to maintain internal communication between capsules. This type of service is used to communicate internally between pods.
NodePort: This type of service exposes the service to a port on each node in the cluster. It provides a way to access the Service outside the group using the node’s IP address and the NodePort.
LoadBalancer: This type of service provides a load balancer. It is typically used in cloud environments where a cloud provider can provision a load balancer automatically.
ExternalName: This type of Service maps the Service to a DNS name. It is used to connect to external services that are not running in the cluster.
Service Discovery
Kubernetes provides built-in service discovery using DNS. Based on the service name and namespace, each service is assigned a DNS name, which clients can use to access the Service.
Kubernetes Ingress
Ingress is a Kubernetes resource that routes traffic from external sources to applications running in the Kubernetes cluster. Using ingress, we can maintain the DNS routing configurations. The ingress controller does the routing by reading the routing rules from the ingress resource.
We must understand the two concepts here:
Kubernetes Ingress Resource: Kubernetes ingress resource stores DNS routing rules in the cluster.
Kubernetes Ingress Controller: Kubernetes ingress controllers (Nginx) are responsible for routing by accessing the DNS rules applied through ingress resources.
We can map the external DNS traffic to the internal Kubernetes service endpoints. This requires an ingress controller to route the rules specified in the ingress object.
Example of creating an Ingress:
The above declaration means that all calls to test.apps.example.com should hit the Service named hello-service residing in the dev namespace.
Conclusion:
In Kubernetes, services and ingress allow you to expose and route traffic to your application running in containers.
Launching a new product can be an exhilarating experience for any business. However, the harsh reality is that not all product launches succeed, and the failure rate can be pretty high!
According to Harvard Business Review, up to 95% of new products fail to meet expectations. This is why it’s essential to have a well-thought-out go-to-market strategy that considers various factors such as market research, target audience, competition, pricing, distribution, and marketing.
By carefully considering these factors and developing a solid gtm strategy, businesses can increase their chances of a successful product launch and capture the attention of their target audience.
This blog discusses a go-to-market strategy and how to formulate a product launch and go-to-market strategy.
Go-to-market Strategy
A go-to-market (GTM) is a comprehensive plan that outlines how a product engineering company will bring its products or services to the market, acquire customers, and generate revenue.
A go-to-market strategy typically involves identifying target customers, developing a unique value proposition, setting pricing and promotion strategies, and outlining sales and distribution channels. The system also includes tactics for creating brand awareness, generating leads, and converting prospects into paying customers. Here’s a go-to-market strategy example:
Identifying the target market through market research, focusing on industries with a high need for the solution.
Crafting a compelling value proposition highlighting the software’s benefits for small businesses, such as time savings and increased efficiency.
Leveraging digital marketing channels like social media, content marketing, and search engine optimization to raise awareness and generate leads.
Offering free trials or demos to showcase the product’s capabilities and encourage adoption.
Establishing partnerships with industry associations or influencers to expand reach and credibility.
Providing exceptional customer support to drive user satisfaction and retention.
Continuously gathering feedback and iterating on the product based on user insights and market trends to maintain competitiveness and drive growth.
A go-to-market strategy is a roadmap for launching a new product or service or expanding an existing one into new markets. It helps companies maximize their market potential, minimize risks, and gain a competitive edge by aligning their business objectives with customer needs and preferences.
Nine Tips for Crafting Your Go-to-market Strategy
Identify your target audience.
The first step in formulating a product launch and go-to-market strategy is identifying your target audience. Understanding your audience will help you tailor your marketing messages and product features to their needs and preferences.
You can use various methods to identify your target audience, such as conducting market research, analyzing data from your existing customers, and analyzing data from your competitors.
Conduct market research.
Once you have identified your target audience, conduct market research to remember their pain points, needs, and preferences. This will help you determine the product features and benefits that appeal to them.
You can conduct market research through various methods, such as online surveys, focus groups, and interviews with your target audience.
Determine your unique selling proposition (USP).
A USP is a unique feature or benefit that differentiates your product from your competitors. Determine your fantastic product and how it will benefit your target audience. This will help you develop a compelling marketing message that resonates with your target audience.
Develop a product positioning strategy.
Product positioning is how you want your target audience to perceive your product. Developing a product positioning strategy that highlights your Unique Selling Proposition (USP) and communicates the benefits of your product to your target audience is crucial for success.
This involves identifying your USP, understanding your audience’s needs and preferences, and crafting a message that resonates with them. By aligning your product’s positioning with your audience’s expectations and preferences, you can differentiate your offering in the market and create a compelling value proposition. Integrating your product positioning strategy with your go-to-market (GTM) strategy also ensures a cohesive approach to launching and promoting your product effectively.
Determine your distribution strategy.
Determine how you will distribute your product to your target audience. Will you sell it online, through retail stores, or through a sales team? Your distribution strategy will depend on your target audience, development, and budget.
Devise a pricing strategy.
Determine how you will price your product. Your pricing strategy will depend on your target audience, development, and competitors. You can use various pricing strategies, such as cost-plus, value-based, and competitive pricing.
Develop a marketing plan.
Develop a GTM plan that includes channels to reach your target audiences, such as social media, email, and content marketing. Your marketing plan should also include a timeline for your product launch and the tactics you will use to generate buzz and interest in it.
Set your launch goals and metrics.
Set specific launch goals and metrics to measure the success of your product launch. Your launch goals may include the number of units sold, the revenue generated, and the number of leads generated. Launch metrics may include website traffic, social media engagement, and open email rates.
Launch and measure.
Launch your product and measure its success. Use your launch goals and metrics to evaluate the success of your product launch and adjust your go-to-market strategy as needed.
Frequently Asked Questions
1. What are the 5 go-to-market strategies?
The five go-to-market strategies include direct sales, channel sales, freemium model, online sales, and strategic partnerships.
2. What is the GTM strategy?
The GTM strategy outlines how a company will bring its product or service to market, encompassing all aspects from product development to sales and distribution.
3. What are the 6 components of a go-to-market strategy?
The six components of a go-to-market strategy typically include market analysis, target audience identification, value proposition development, sales and distribution channels, marketing and promotional tactics, and pricing strategy.
4. What is the difference between a go-to-market strategy and a market strategy?
A go-to-market strategy focuses on bringing a product or service to market, whereas a market strategy may encompass broader aspects of market analysis, segmentation, and positioning within the overall market landscape.
5. What is your go-to-market strategy example?
An example of a go-to-market strategy could involve leveraging online sales channels, targeted digital marketing campaigns, and strategic partnerships with influencers to launch a new line of eco-friendly household products to environmentally-conscious consumers.
Conclusion
Launching a new product can be daunting, but having a well-planned go-to-market plan can increase your chances of success. From conducting thorough market research to setting launch goals and metrics, every step in the process requires careful consideration and planning.
By taking a holistic approach and paying attention to the nuances of your industry, you can develop a strategy that connects with your target audience and sets your product apart from the competition. Remember, a successful product launch results from a comprehensive system addressing every aspect of the product’s journey from conception to launch.
The phrase “infrastructure as code” is frequently used in infrastructure automation.
In the past, the provisioning of IT infrastructure was done manually or using tools. A self-service portal was absent. A server or network provisioning request may take days to complete.
Two key ideas in product engineering that help teams manage and automate their infrastructure and application configurations are Infrastructure as Code (IaC) and Configuration Management (CM).
Using IaC to automate infrastructure provisioning, developers may avoid manually managing servers, operating systems, storage, and other infrastructure components each time they create or deploy an application. Coding your infrastructure provides a template for provisioning that you can use; however, you can still do it manually or have an automation tool do it for you.
However, with the introduction of cloud computing, supplying infrastructure has become simple as cloud providers use virtualization and software-defined networking to abstract away much of the complex setups. In minutes, you can provision a network, servers, and storage.
APIs power everything. To communicate with their platform and deploy infrastructure, all cloud providers expose APIs. You can control your IT infrastructure using the programming language. In addition to provisioning, you can use code to configure the resources. As organizations embrace the cloud and DevOps culture, Infrastructure as Code (IaC) and Configuration Management (CM) have emerged as critical practices for building and managing modern infrastructure. This article will explore what IaC and CM are, why they are essential, and how they can benefit your organization.
What is Infrastructure as a Code?
The approach of declaratively managing infrastructure with code, generally kept in version control systems like GIT, is called infrastructure as code (IaC). Infrastructure as code (IaC) aims to manage and define it using code that can be automated, tested, and versioned.
Administration manually configures servers and networks using scripts and graphical user interfaces (GUIs) in conventional infrastructure management.
This method may be error-prone, time-consuming, and challenging to maintain. IaC, in contrast, enables enterprises to use code to automate the provisioning and administration of infrastructure, lowering the chance of errors while boosting productivity and flexibility.
Infrastructure as code (IaC) allows for the controlled and predictable implementation of infrastructure upgrades. This will enable teams to collaborate more successfully and maintain consistency throughout their infrastructure.
Configuration Management
Configuration management (CM) is establishing, maintaining, and changing the configuration of servers, apps, and other components in an IT system. CM aims to guarantee that the infrastructure configuration adheres to organizational requirements and is consistent, predictable, and compliant.
For example, Ansible playbooks or Puppet manifests are configuration files that specify how infrastructure components should be configured. With automation technologies, these configuration files are then applied to the infrastructure, ensuring that the infrastructure is kept in the appropriate state.
The advantages of CM include greater infrastructure consistency and dependability, decreased downtime, and increased responsiveness to shifting business requirements.
Why is IaC and CM Implementation Required?
IaC and CM are crucial techniques for managing modern infrastructure because they offer several advantages, such as:
Improved Agility and Effectiveness: Organizations can automate the provisioning and maintenance of infrastructure components by using code, which lowers the time and effort needed to make changes. Teams can react to changing business requirements more quickly and run less of a risk of making mistakes as a result.
System Security and Stability: IaC and CM ensure that infrastructure elements are set up consistently and according to organizational requirements. This decreases the possibility of errors and downtime caused by incorrect setups or manual interventions.
Enhanced Connectivity: By managing infrastructure with code, teams may cooperate more effectively and exchange best practices. Version control systems can save code, allowing teams to track changes, examine code, and offer feedback.
Auditing and Enforcement: By using LaC and CM, organizations can ensure that their infrastructure complies with internal policy and industry laws. By utilizing code to control infrastructure, organizations can more readily show compliance and offer audit trails.
Best Practices for IaC and CM
It’s crucial to adhere to optimal practices to maximize the benefits of IaC and CM. Consider the following advice:
Use Version Control
Use pull requests to evaluate and merge changes to the infrastructure code kept under version control in a program like Git.
Begin Modestly and Iterate
Iterate on your infrastructure code as you learn more by starting with a small, manageable project. This can help you avoid complications and ensure that you are moving forward.
Implement Idempotent Tools for Managing Configurations
End up choosing tools for managing configurations that are idempotent or capable of being executed several times without producing unexpected results. This can assist in making sure your infrastructure is consistent and dependable throughout time.
Automate Installations: Use tools like Ansible, Puppet, or Chef to deploy your infrastructure and configuration. This ensures consistency and decreases the risk of human error.
Use Testing: Before deployment, properly test your IaC and CM code for any issues. Use programs like Test Kitchen, InSpec, or Serverspec to automate your testing.
Consider Infrastructure as Transitory: Use the concepts of immutable infrastructure, meaning that new infrastructure should be built for each deployment instead of modifying the current infrastructure. Consistency is ensured, and failures are easier to recover from.
Document Everything: Your infrastructure and configuration code must be well documented for others to understand how it functions and make any necessary adjustments.
Use Best Practices for Security: Verify that the IaC and CM code industry standards for security. First, use safe network setups, encrypt sensitive data, and adhere to the least privilege principle.
Keep Track of Observations: Set up logging and monitoring for your infrastructure and settings. This enables quick problem identification and resolution.
Constantly Get Better: Review your IaC and CM code frequently to see opportunities for advancement. To automate infrastructure modifications, use tools like CloudFormation or Terraform.
Employ a Declarative Structure: In your IaC scripts, take a declarative approach where you declare the infrastructure’s ideal state and leave the specifics of how to get there up to the automation tool. This reduces the possibility of unforeseen outcomes and makes it simpler to reason about the infrastructure.
Conclusion
In conclusion, infrastructure as Code (IaC) and Configuration Management are essential practices in modern software development and IT operations.
IaC enables teams to identify and manage infrastructure resources using code by providing the same automation and version control level as software development. Using IaC, teams can provision and manage servers, networks, and other infrastructure components more consistently, swiftly, and reliably.
Configuration management controls how software and equipment components are configured to ensure they operate correctly and effectively. Configuration management solutions help teams manage developmental tasks, configurations, and settings, assuring consistency and dependability in various situations.
In today’s fast-paced business environment, efficiency and productivity are crucial to staying competitive. One of the most effective ways to achieve this is through workflow automation. Organizations can save time, reduce human error, and ultimately improve their bottom line by automating repetitive tasks and streamlining processes.
Workflow automation offers a powerful solution to streamline product engineering operations, improve efficiency, and enhance overall productivity.
In this blog post, we explore workflow automation and discuss how you can use it to improve your business processes.
What is Workplace Automation?
Workflow automation is using technology to automate repetitive tasks and complex business processes. It involves using software tools and applications to automate an organization’s repetitive, manual tasks and processes.
It allows organizations to manage and optimize their workflows more effectively while minimizing the need for human intervention. It enables businesses to save time, reduce human error, and allocate resources more effectively. Workflow automation can be applied to various aspects of business, including project management, customer service, human resources, and sales. By automating workflows, companies can focus on their core competencies and strategic objectives while minimizing inefficiencies and developing great products.
Benefits of Workflow Automation
Increased Efficiency
By automating repetitive tasks, businesses can significantly reduce the time and effort required to complete them. This leads to improved efficiency and productivity across the organization. It also minimizes human error, enhances productivity, and allows employees to focus on more strategic tasks.
Reduced Errors
Human errors are inevitable, especially when it comes to monotonous tasks. Workflow automation minimizes the chances of such mistakes, ensuring higher accuracy and quality in your processes.
Better Resource Allocation
Automating tasks allows you to redistribute valuable human resources to more strategic and high-value jobs, leading to more effective workforce use.
Improved Compliance
Automation can help enforce company policies and regulatory requirements, reducing non-compliance risk.
Enhanced Scalability
Workflow automation enables businesses to scale their processes more efficiently, catering to customers’ and the market’s growing demands without compromising on quality or efficiency.
Better Collaboration and Communication
Automated workflows can improve collaboration and communication among team members by providing real-time updates and notifications, ensuring everyone is on the same page and working towards a common goal.
Implementing Workflow Automation To Improve Business Processes
Identify Areas for Automation:
The first step in implementing workflow automation is determining the processes that can benefit the most from automation. Look for repetitive, time-consuming tasks that are prone to human error. Common examples include data entry, invoice processing, and employee onboarding.
Here are some key factors to consider:
Repetitive and Time-Consuming Tasks
The best candidates for automation are tasks that are repetitive, time-consuming, and prone to human error.
Rule-Based Processes
Processes that follow rules or guidelines can be easily automated, as they have a clear structure and a predictable outcome.
High-Volume Tasks
Tasks performed frequently or in large volumes can significantly benefit from automation, which can help reduce the overall time spent on these tasks.
Choose the Right Tool:
Select a workflow automation tool that best suits your organization’s needs. Ensure that it offers flexibility, scalability, and seamless integration with your existing product engineering systems.
When selecting a tool, consider the following factors:
Integration Capabilities
Choose a tool that can easily integrate with your existing systems and applications to ensure seamless data flow and compatibility.
Customization and Flexibility
Look for a tool that offers customization options and can adapt to your unique business processes and requirements.
Ease of Use
Select a user-friendly tool for your team to learn and use.
Scalability
Ensure your chosen tool can scale with your business as it grows and evolves.
Define the Workflow:
Clearly define the steps and rules of the workflow to ensure that the automation process runs smoothly. This includes specifying the triggers, actions, and conditions for each task in the workflow. Follow steps like defining goals and objectives, mapping existing processes, and designing and developing automated processes.
Test and Refine:
Before implementing the automated workflow, test it thoroughly to identify any issues or bottlenecks. Please make the necessary adjustments and refine the process until it functions seamlessly. Iterate and refine as needed.
Train Employees:
Ensure your employees are well-trained in using the workflow automation tool and understand the new processes. This will help them adapt to the changes and maximize the benefits of automation.
Monitor and Improve:
Continuously monitor the performance of your automated workflows and make improvements based on data and feedback. This will ensure that your processes remain efficient and up-to-date with changing business needs.
Conclusion
Workflow automation can transform your business processes, improving efficiency, accuracy, and productivity. By identifying the right strategies to automate, selecting the appropriate tools, and following a structured implementation plan, you can unlock the full potential of workflow automation for your organization.
Embrace this powerful tool to streamline operations, empower employees to focus on higher-value tasks, and drive your business toward sustained growth and success. Stay ahead of the competition by incorporating workflow automation into your business processes and witness its transformative impact on your organization’s overall performance.
Software development that emphasizes creating software applications as a group of independent services is known as service-oriented architecture or SOA. Each service offers a particular capability or function and can be accessed by other services or applications via a standard protocol.
Because of its various advantages, SOA is a widely utilized software development method. In this post, we’ll examine SOA in more detail, how it functions, and some of its advantages.
Service-oriented architecture (SOA) – what is it?
The goal of service-oriented architecture is to produce software components that are scalable, reusable, and interoperable for your product engineering initiatives. Each SOA component or service is created to carry out a particular function. It may be accessed by other services or applications using a standard communication protocol, such as HTTP or SOAP.
THE SERVICES ARE INTENDED TO OPERATE INDEPENDENTLY because SOA is a loosely linked architecture. Individual services can now be changed or replaced more easily without affecting the system as a whole.
How does SOA function?
A system is constructed using a service-oriented architecture, which involves a collection of services communicating. Each service offers a particular feature or capability; other services or applications can access these services via a standard communication protocol.
Common web services standards in SOA communication protocols include Simple Object Access Protocol (SOAP) and Representational State Transfer (REST). Regardless of the elemental technology or programming language, these standards offer a shared vocabulary for services to communicate with one another.
Advantages of SOA:
Using a service-oriented architecture for product engineering has several advantages. The following are some of the most vital benefits:
Flexibility:
One of SOA’s main advantages is promoting the creation of reusable software components. Each service is intended to carry out a particular function that can be reused in many systems or applications. Because developers don’t have to start from scratch each time they need to create a new application, this cuts down on development time and expenses.
Integration:
SOA encourages interoperability across various systems and applications. Regardless of the technology or programming language used, services can be accessed and used by other applications since each service communicates using a standard communication protocol. Because of this, it is simpler to incorporate new services into existing systems, which can help businesses run more efficiently and spend less money.
Extensibility:
A very scalable architecture is SOA. Each service can be scaled independently of others. Businesses can add or withdraw services as they meet shifting customer demands. Because services are loosely connected, modifications to one shouldn’t affect the other.
Consistency:
SOA encourages maintainability by making managing and updating individual services more straightforward. Since each service is intended to operate independently of the others, it is possible to modify or update a single service without impacting the system as a whole. Large, complicated procedures may be updated and maintained more efficiently, lowering the possibility of mistakes or downtime.
Agility:
Finally, SOA encourages agility by making adapting to shifting business needs or user requirements more straightforward. Organizations may swiftly modify their systems to meet new challenges or opportunities because services are loosely connected and can be scaled and upgraded independently. By doing this, businesses can improve their overall business agility and stay one step ahead of the competition.
Conclusion:
Service-oriented architecture has many advantages over other methods for creating software, including reusability, interoperability, scalability, maintainability, and agility. By developing software systems as a collection of independent services, organizations can decrease costs and development time, increase system flexibility, and create more modular systems.
Many sources provide this data, including consumer encounters, sales transactions, and operational procedures. Companies must manage, store, and analyze this data to gain valuable insights. Data warehousing and online analytical processing (OLAP) technology are helpful in this situation.
OLAP (Online Analytical Processing) technology and data warehousing are two crucial techniques used in corporate intelligence. These tools assist businesses in processing, analyzing, and deciphering massive amounts of data from many sources to get insightful knowledge and make wise decisions.
Product engineering can benefit significantly from OLAP (Online Analytical Processing) technologies and data warehousing. They allow engineers to compile and organize massive amounts of data, giving them insights into a product’s performance over time.
This post will examine the fundamentals of data warehousing and OLAP technology, their advantages, and current enterprise applications.
Data Warehousing
Data from many sources, including transactional systems, customer databases, and external sources, are kept in a sizable, central repository called a data warehouse. Companies employ data warehouses to combine and analyze vast amounts of data in a way that is accessible and understandable.
Data extraction, transformation, and loading (ETL), data storage, and retrieval are some operations involved in data warehousing. Data is retrieved from many sources and transformed into a standard format during the ETL process to be fed into the data warehouse. Once loaded, the data can be accessed and examined using various tools and technologies.
Data warehousing can benefit organizations. It first enables companies to store and handle massive amounts of data in a single location. This facilitates access to and analysis of data from various sources, allowing firms to spot patterns and trends. Data warehousing also contributes to ensuring data quality.
Architecture for data warehousing:
Typically, a data warehouse has a three-tier design made up of the following:
Source System Layer: This layer is in charge of extracting data from various sources, including files, databases, and software programs.
Data warehouse layer: The converted and integrated data are kept in the data warehouse layer. A staging area, a data integration layer, and a dimensional model layer are frequently present.
The business Intelligence Layer offers data analysis, reporting, and querying resources. It contains dashboards, OLAP tools, and other analytical software.
OLAP Technology:
OLAP technology is vital for swiftly and effectively analyzing massive amounts of data. Online Analytical Processing, or OLAP, refers to a system that processes data in real-time and immediately gives consumers feedback.
Data is divided into various dimensions, such as time, region, and product, and OLAP technology is based on a multidimensional data model.
OLAP technology’s main advantage is that it allows companies to swiftly and effectively analyze vast amounts of data. OLAP technologies enable users to manipulate data in various ways, giving them access to insights into data that would be challenging to view with conventional reporting tools.
With OLAP technology, users can also access interactive dashboards and reports, making it simple to visualize data and recognize trends and patterns.
OLAP Technology and Data Warehousing in Practice:
Let’s look at a national chain of giants with hundreds of locations. The business gathers information on various variables, such as sales, inventory levels, and client demographics. The company has set up a data warehouse and OLAP technologies to manage the data.
Data is processed and loaded into the data warehouse uniformly so that OLAP tools can access and analyze it.
In reality, companies of all sizes and various industries employ OLAP and data warehousing technology. For instance, retail data warehousing and OLAP technologies can be used to check inventory levels, anticipate sales, and evaluate customer purchasing trends. Data warehousing and OLAP technology can be used in the financial industry to track risk and spot fraud.
Overview of OLAP Technology:
Large and complex database analysis is made more accessible by OLAP technology. Users can delve further into the data to learn more about the information. This technique is frequently employed in applications for business intelligence, where it can assist users in deriving more meaningful conclusions from the data.
A distinctive feature of OLAP technology is its multidimensional approach to database optimization. In other words, rather than viewing data from only one angle, it enables users to assess information from various angles. This multidimensional technique is implemented using a three-dimensional data representation cube.
Key Features of OLAP Technology
The key features of OLAP technology include the following:
Multidimensional Analysis: OLAP technology allows users to analyze data from multiple dimensions, including time, geography, and product category, among others.
Fast Query Performance: OLAP technology can perform complex queries on large datasets in seconds, making it ideal for real-time applications.
Data Aggregation: OLAP technology can aggregate data across multiple dimensions, allowing users to see data summaries at a high level.
Drill-Down Capability: OLAP technology allows users to drill down into the data to see more detailed information.
Data Visualization: OLAP technology can visualize data in charts, graphs, and other visualizations, making it easier for users to know the information.
Benefits of OLAP Technology
The benefits of OLAP technology include the following:
Faster Data Analysis: With OLAP technology, users can analyze large datasets in real time without waiting long for the results.
Improved Decision-Making: OLAP technology allows users to make more informed decisions based on the data, thanks to its multidimensional analysis capabilities.
More Accurate Forecasting: OLAP technology can help users make more accurate forecasts by providing them with insights into the data they would not otherwise have access to.
Increased Productivity: OLAP technology can help to increase productivity by providing users with faster access to data and reducing the time required for data analysis.
Cost Savings: OLAP technology can reduce costs by enabling users to make more informed decisions and identify areas for improvement.
Applications of OLAP Technology
OLAP technology is widely used in business intelligence applications, where it is used to analyze large volumes of data to gain insights into the information. Some of the applications of OLAP technology include:
Sales Analysis: OLAP technology can be used to analyze sales data from multiple dimensions, such as time, product category, and geography, among others.
Financial Analysis: OLAP technology can analyze financial data, such as revenue, expenditures, and profitability, across multiple dimensions.
Inventory Management: OLAP technology can analyze inventory data, such as stock levels, reorder quantities, and lead times, across multiple dimensions.
Customer Relationship Management: OLAP technology can analyze customer data, such as demographics, purchase history, and feedback, across multiple dimensions.
Supply Chain Management: OLAP technology can analyze supply chain data, such as lead times, transportation costs, and supplier performance, across multiple dimensions.
Conclusion
In conclusion, OLAP technology and data warehousing are essential for organizing and analyzing massive amounts of data. While OLAP enables users to do interactive, multidimensional queries on the data, data warehousing entails gathering and storing data from several sources to create a consistent picture of the data. These technologies are beneficial when it comes to corporate intelligence and decision-making processes.
However, creating and executing a data warehouse and OLAP system can be difficult and involves careful planning and consideration of data modeling, data integration, and performance optimization. Moreover, technological developments like big data and cloud computing are altering the field of data warehousing and OLAP. Organizations must therefore keep abreast of the most recent trends and product developments.
The Software Composition Analysis (SCA) method entails locating and monitoring external components’ utilization during software development. It is essential to ensure that software applications are secure and compliant. Automation of SCA can speed up the procedure, improve accuracy, and lessen the manual labor required for the analysis.
Software composition analysis (SCA) is a crucial step in locating security holes and license compliance problems in software applications. However, conducting SCA manually can be time-consuming and error-prone.
Automating your SCA procedure can increase the accuracy of your results while also saving time. This article will discuss automating your SCA process to make your product engineering process more productive and efficient.
Choose The Proper SCA Tool:
Choosing the appropriate SCA tool is the first step in automating your SCA process. Numerous SCA instruments are on the market, each with advantages and disadvantages. While some tools are more general-purpose, others are created for particular platforms or programming languages. Consider your firm’s unique needs and specifications before choosing an agency.
Improve Your CI/CD Pipeline by Including SCA:
You may find vulnerabilities and licensing compliance problems early in the development strategy by integrating SCA into your CI/CD pipeline. Lowering the need for human input and modification after the creation cycle can save time and money. You can incorporate SCA into your workflow using instruments like Jenkins, CircleCI, or TravisCI.
Automate the Process of Vulnerability Identification:
Automated SCA tools can assist you in finding vulnerabilities in your codebase by examining the open-source components and libraries utilized in your application. The program searches your codebase and reports any potential problems or known vulnerabilities. This can lower the likelihood of a data breach by helping you prioritize which vulnerabilities to address first.
Automatic Checks for License Compliance:
You may make sure that open-source license compliance by using automated SCA tools. These tools can search your codebase for any open-source parts subject to license responsibilities or restrictions. By doing this, you may protect yourself from potential legal problems and make sure your application complies with open-source licensing.
Plan routine SCA Scans:
You cannot just set your SCA process into automated mode. Plan routine scans to ensure your codebase remains free of vulnerabilities and licensing compliance issues. Setting up regular scans can assist you in identifying concerns early on and prevent them from developing into significant problems later in the development cycle.
Personalize Your SCA Procedure:
The default settings for automated SCA tools can be changed to suit your unique requirements. For instance, you can set the tool up only to scan particular directories or files, ignore specific libraries or components, or change the severity of vulnerabilities by your organization’s risk tolerance. You can better adapt the tool to your needs and increase the accuracy of your results by customizing your SCA procedure.
Develop Your Team:
Automating your SCA process requires a significant time and resource commitment. Therefore, it’s crucial to instruct your team on the proper usage of the SCA tool. This can ensure that everyone in your company uses the tool correctly and understands how to interpret the data.
Outcome:
Finally, automating your SCA procedure can enhance the speed and efficacy of your product engineering procedure. You can decrease the danger of a data breach and avert potential legal problems by choosing the appropriate SCA technology, incorporating SCA into your CI/CD pipeline, and personalizing your SCA procedure. You can produce higher-quality software more quickly and increase organizational security by automating your software certification process (SCA).
Docker containers are a powerful tool for managing and deploying applications, providing a lightweight and flexible environment that can be easily configured and scaled. However, as with any technology, debugging and troubleshooting problems can arise. Since Docker containers are frequently used for managing and deploying applications in production environments, debugging and troubleshooting Docker containers is a crucial component of product engineering. This article will explore some common issues that may arise when working with Docker containers and provide some tips and techniques for debugging and troubleshooting them.
Check the Container logs: The first step in debugging a Docker container is to check the container logs. Docker logs provide valuable information about what is happening inside the container and can help identify the source of the problem. To view the records for a container, use the docker logs command followed by the container ID or name. For example, to view the documents for a container named my-container, use the following control:
Docker logs my-container
The logs will be displayed in the console, and you can use the -f flag to follow the records in real time as they are generated:
docker logs -f my-container
Check the Container Status: Another helpful command for debugging Docker containers is docker ps, which lists all running containers and their status. This can help identify containers that are not running correctly or have stopped unexpectedly. To view the container status, use the following command:
docker ps
This will display a list of all running containers and their status, such as Up or Exited.
Check the Container Configuration: When debugging a Docker container, it is essential to check the configuration to ensure it is correctly configured. This can include checking the container image, environment variables, network configuration, and other settings that may affect the container’s behavior. To view the container configuration, use the docker inspect command followed by the container ID or name. For example, to view the design for a container named my-container, use the following control:
docker inspect my-container
This will display detailed information about the container configuration, including the container image, environment variables, network settings, etc.
Check the Container Networking: Networking issues can also cause problems when working with Docker containers. To check the container networking, use the docker network command to view the available networks and their settings. For example, to view the available networks, use the following command:
docker network ls
This will display a list of all available networks, including their names, IDs, and driver types.
Check the Host System: Sometimes, the problem may not be with the container but the host system. To check the host system, use the docker info command to display information about the Docker installation, including the version, operating system, and other details. For example, to view information about the Docker installation, use the following command:
docker info
This will display information about the Docker installation, including the version, operating system, and other details.
Use Docker Exec to Access the Container: If you need to access the running container to investigate further, you can use the Docker exec command to execute a command inside the container. For example, to access the bash shell inside a container named my-container, use the following control:
docker exec -it my-container /bin/bash
This will start a new shell session inside the container, allowing you to investigate further.
Use Docker-compose for Complex Setups: If you are working with complex setups involving multiple containers, it can be helpful to use Docker-compose to manage the deployment and configuration of the containers. Docker-compose allows you to define various containers and their design in a single file, making it easier to manage and deploy complex setups.
Use Docker Health Checks: Docker health checks are a built-in feature that can be used to monitor the health of a container and automatically restart it if it fails. A health check can be defined in the container image or the docker-compose.yml file, and it can run any command or script to check the container’s health. For example, to define a health check that runs an order every 30 seconds to check the container’s availability, use the following control:
docker run –health-cmd=“curl –fail http://localhost:8080/health || exit 1” –health-interval=30s my-container
Use Docker Stats to Monitor Resource Usage: Docker stats is a command that can monitor the resource usage of running containers, including CPU usage, memory usage, and network I/O. To view the stats for all running containers, use the following command:
docker stats
This will display a real-time list of all running containers and their resource usage.
Use Docker Events to Monitor Container Events: Docker events is a command that can monitor events related to Docker containers, such as content creation, start, stop, and removal. To view the Docker events in real time, use the following command:
docker events
This will display a stream of events related to Docker containers, which can help debug and troubleshoot issues related to the container lifecycle.
Conclusion:
While the pointers above detail some of the common issues, there could be edge cases that require a deeper dive into the specific problems that could come up and more extensive debugging. However, for the most part, we hope these tips will make working with containers a little more convenient and speed up the debugging process.
An essential skill for product engineering teams working with containerized apps is debugging and troubleshooting Docker containers. Due to their portability and scalability, containers are a standard tool for deploying programs, yet, when anything goes wrong, they can also bring particular issues.
Product engineering teams must first comprehend how containers function and interact with the host operating system to successfully debug and troubleshoot Docker containers. They should also know the various methods and tools for debugging and troubleshooting containers, such as network debugging, container inspection, and logging.
Efficient debugging and troubleshooting involve technical expertise, teamwork, and communication. Product engineering teams should define precise protocols and procedures to discover, diagnose, and fix container issues and ensure every team member knows them.
Ultimately, being proactive and thorough in finding and resolving issues is the key to successfully debugging and troubleshooting Docker containers. Product engineering teams may reduce downtime and ensure their containerized apps function smoothly and dependably by adhering to best practices and utilizing the appropriate tools and approaches.
Data storage is a crucial component of the high-performance computing (HPC) industry. Massive volumes of data must be stored and accessed quickly, scalably, and reliably for large-scale simulations, machine learning, and big data analytics. This article will investigate the potential savings of an ephemeral Amazon FSx for Lustre.
Using an ephemeral Amazon FSx for Lustre file system for momentary or brief data processing workloads rather than continually running it can help product engineering cut costs. You can benefit by using FSx for Lustre as a temporary file system by spinning it up only when necessary and shutting it down once the task ends.
A high-performance file system that is wholly managed and geared toward HPC workloads is called Amazon FSx for Lustre. It offers a throughput of up to hundreds of terabytes per second and sub-millisecond latencies. The open-source Lustre file system, widely used in HPC contexts, serves as the foundation for FSx for Lustre.
Creating a temporary file system is one of Amazon FSx for Lustre’s core capabilities. Temporary files are transitory files that exist while a calculation runs. When a job is submitted to a cluster, it is formed and destroyed once it is finished. A temporary file system is a good choice for saving money.
Storage and computation resources are often allocated in traditional HPC systems. This could cause storage to be over-provisioned, which is expensive. The scaling can modify storage resources up or down.
Traditional storage methods provision storage for the highest workload possible, even if that workload only sometimes happens. As a result, expenses increase since idle storage resources are not being used. When using a temporary file system, storage resources are only supplied for the duration of the workload. Costs are decreased, and unused storage resources are eliminated.
Establishing a multi-tenant environment with a temporary file system is another benefit. In a multi-tenant system, several users can share the same computing and storage resources. This allows for more effective resource use, which can cut costs.
Because it can be quickly produced and erased, a temporary file system is perfect for multi-tenant environments because it enables quick turnaround times between jobs.
A temporary file system also offers a high level of security. Data leaks and security breaches are less likely because the file system is transient. Data is destroyed when a job is finished, so the file system is clear of any leftover information. As a result, there is less chance that data may be compromised in the event of a security incident.
A temporary file system can increase performance while lowering expenses. Data may be accessed quickly and fast since the file system and computation resources are closely connected. Increased productivity and quicker job completion times may result from this. The scheduling of jobs is also more flexible with a temporary file system.
Some additional capabilities offered by Amazon FSx for Lustre can also lower expenses and enhance performance. They include data compression, which reduces storage needs, and automatic data tiering, which switches data between various storage classes based on usage patterns.
FSx for Lustre also supports AWS Lambda functions, which can automate routine chores and save money.
The Operation of Amazon FSx for Lustre:
Let’s look at how Amazon FSx for Lustre works before designing the proper database schema for optimization.
Built on the open-source, parallel Lustre file system, which is widely used in HPC and other powerful computational contexts, Amazon FSx for Lustre is a fully managed file system.
Amazon FSx for Lustre offers a scalable and effective file system that can be utilized for various workloads. Thanks to the file System’s Design, large data sets can be accessed quickly and with little delay, making compute-intensive tasks like machine learning, data analytics, and scientific simulations a perfect fit.
Use an Ephemeral File System to Cut Costs:
Now that we know how Amazon FSx for Lustre functions, let’s look at how using and constructing a temporary file system might help you save money.
A file system produced on demand and removed when no longer required is known as a transient file system. You can establish a temporary file system with Amazon FSx for Lustre that is utilized for a particular task or job and then erased after the job is finished.
It is easy to set up a temporary file system. The “Ephemeral” option can be chosen when creating a new file system using the Amazon Management Console, CLI, or SDK. Once the file system has been built, you can use it the same way you would any other Amazon FSx for the Lustre file system.
Using a temporary file system has the main advantage that you only pay for the storage and computing resources you utilize. You don’t pay continuous charges for storage or computing resources because the file system is erased when it is no longer required.
Using a temporary file system can be especially advantageous for workloads that need a temporary file system to store information for processing or analysis. You can build a quick file system to store the data and output of a machine learning task, for instance, if the job requires a lot of CPU and storage resources. You can erase the file system once the work is done, and there won’t be any further expenses.
Conclusion:
A high-performance file system called Amazon FSx for Lustre is created for computer-intensive workloads like machine learning, high-performance computing (HPC), and video processing. A file system built-in memory that exists only while it is tied to an EC2 instance is known as a short FSx for a Lustre file system. Because there is no longer a need for lengthy data storage, this file system can help product engineering save money.
Amazon FSx for Lustre is a fantastic option for compute-intensive workloads because it is a robust and scalable file system. You can cut costs by developing and utilizing a temporary file system and only paying for the storage and computing resources you use.
Digitization has taken over the world. Everything is becoming digital, and data is the most important thing you can think of in this digital age. From large, successful firms to small, slowly growing startups, every business has to have reasonable control of the data and needs to manage and operate vast amounts of data efficiently.
Building data structures for database indexing aids in quickly retrieving and searching data in a database. The indexing process entails creating a data structure that links the values of a table’s columns to the precise location of the data on the hard drive. This enables the database to rapidly find and retrieve data matching a particular query.
Database indexing and optimization are crucial in product engineering to ensure the product runs smoothly and effectively.
Managing data is not easy. Organizing data can be a nightmare. But at the same time, it is the most crucial aspect of managing data. Collecting data is essential so that you can access well-organized data easily. This is where database indexing and optimization come in.
This blog will help you understand the basics of database indexing and optimization and how they help improve the performance of databases.
What Is Database Indexing?
A database index is a data structure that stores a copy of selected columns of a table. It is a data structure that gives you quick access to the information you need without going through the entire data in a table. This optimizes fast searching, making finding specific data in an extensive database much quicker. Think of a database index as a book’s index, which helps you quickly locate detailed information within the text.
A database index creates a separate data structure containing a list of index entries. Each entry includes a key value and a pointer to the location of the corresponding data in the table. When a query is executed, the database engine uses the index to find the relevant data quickly rather than scanning the entire table.
The most common types of indexes are B-tree and hash indexes. B-tree indexes are most commonly used in databases because they can handle various queries and perform read and write operations well.
Why is Database Indexing Important?
Database indexing is fundamental when dealing with complex queries involving multiple tables. Without indexes, the database engine would need to perform a full table scan of every table involved in the question, which could take a long time. The machine can use indexes to locate the relevant data, quickly improving query performance.
What is Database Optimization?
Database optimization makes a database more efficient by improving its performance, reducing resource usage, and increasing scalability. This can involve various techniques, including indexing, query optimization, and server tuning.
Database optimization is essential for ensuring that a database can handle the demands placed on it by the organization. As data volumes grow and the number of users accessing the database increases, optimization becomes even more critical to maintaining performance and avoiding downtime during product engineering efforts.
How to Optimize a Database?
There are several steps you can take to optimize a database, including:
Use indexes
As we’ve already discussed, indexing is crucial to database performance. To improve query performance, ensure that your database has indexes on frequently queried columns.
Optimize queries
Poorly written queries can significantly impact database performance. Ensure questions are written efficiently and avoid unnecessary joins or subqueries.
Use caching
Caching frequently accessed data can help reduce the number of queries that need to be executed, improving performance.
Manage transactions
Transactions are essential for ensuring data consistency in a database. However, poorly managed transactions can impact performance. Ensure that transactions are kept as short as possible and committed or rolled back promptly.
Server tuning
The server hosting the database can also impact performance. Ensure the server is configured correctly and has sufficient resources to handle the demands.
Conclusion
Database indexing and optimization are critical components of managing large datasets efficiently. A database can quickly locate the relevant data using indexes, even with millions of rows.
Database optimization involves various techniques to improve performance, reduce resource usage, and increase scalability, including indexing, query optimization, and server tuning. By optimizing a database, organizations can ensure that they can handle their demands and avoid downtime.
Mobile computing has taken the world by storm in recent years, and developers are constantly seeking ways to keep pace with its lightning-fast evolution. The need for quick action and easy adaptation has given rise to Microservices Architecture, a revolutionary approach to application development. With this cutting-edge concept, developers can change applications on the fly without needing full-scale redeployment.
What Is Microservices Architecture?
Microservices architecture is a variant of service-oriented architecture structural style. The software development approach aims to break down an application into small and independent services.
These independent services can be used and managed independently without depending on other applications. Each service in Microservices architecture performs a specific function and, when required, communicates with other services using lightweight protocols such as HTTP or RESTful APIs.
Data storage, processing, and presentation – every service in Microservices Architecture independently performs all these functions. Every service of Microservices Architecture uses a different programming language. Even the database and technology stack of that service is entirely different from others, and this helps organizations utilize the best tool for each specific task.
Microservices architecture is often associated with a monolithic architecture, in which the application is developed as a single, large, and tightly coupled unit.
Microservices architecture offers several benefits, including scalability, flexibility, resilience, and easier maintenance. This blog is a guide to understanding these benefits and why it has become an increasingly popular approach to building software applications.
Benefits of Microservices Architecture
Among the numerous benefits Microservices architecture provides in product engineering, here we mention a few.
Scalability and Flexibility
Scalability and flexibility go hand in hand. You can independently scale each service depending on the requirements. This way, consumers’ demands matter for an organization since you can quickly add or remove resources based on their demands.
Businesses don’t have to scale the services they don’t need. It makes it easier for such companies to handle high-traffic loads and saves them some extra time.
Another advantage that microservices architecture offers is flexibility. Developmental processes may require a single service to be developed and deployed. So instead of creating an entire application, you can set and use Microservices, which can be managed independently. This adds greater flexibility to the development process.
Improved Resilience and Fault Isolation
In a monolithic application, the failure of one system component can affect the entire application. However, with microservices architecture, if a single service fails, you don’t have to worry about the failure of other applications as it does not affect the rest of the applications.
This is because each service in this system is designed to be independent of the others, which means the application can function even if the other services are no longer operating.
Increased Agility and Innovation
Microservices architecture has benefited organizations and firms by making them more agile and ingenious. Businesses and organizations can always experiment with new, innovative ideas with microservices. This is because they know that if changes are made in one service, they do not impact the entire application.
Therefore, organizations can now iterate faster and bring new innovative features to market more quickly.
Additionally, microservices architecture has encouraged businesses to adopt a DevOps approach to software development. Such an agile and reliable approach allows for greater and more successful collaboration between developers and operations teams. This also allows for fast code development and easy incorporation of feedback.
Easier Maintenance and Upgrades
Microservices architecture has made maintenance and upgrades a piece of the cake. You can now update individual services without worrying about their effect on the rest of the application.
This allows you to edit a particular system and makes keeping the desired applications and services up-to-date and well-maintained easier. It also reduces the risk of downtime during upgrades.
Improved Scalability and Performance
You can now improve an application’s scalability and performance thanks to Microservices Architecture. Since every service can be scaled independently, dealing with high-traffic loads has become more manageable. This helps you improve the overall performance of the application. Besides, microservices architecture can enhance the responsiveness of an application, as services can be optimized for specific tasks.
Easier Integration with Third-Party Services
Last but not least, microservices architecture has made it a lot easier to integrate third-party services into an application. Each service can be specifically designed according to the need to communicate with third-party services using lightweight protocols such as HTTP or RESTful APIs, making it easier to integrate with other systems.
Conclusion
In short, Microservices architecture is no less than a blessing for developers who have been facing several challenges with traditional monolithic solutions. Microservices architecture is a modern approach to product development that brings numerous benefits to organizations of all sizes and types.
Atomicity, Consistency, Isolation, and Durability are abbreviated as ACID. These properties define the fundamental requirements for a transaction to maintain data integrity in a database. Transactions are operations that change data in a database, and ACID properties ensure that these changes are completed correctly and reliably.
Data consistency in product engineering ensures products function as intended and provide a positive user experience. For instance, if a customer purchases a product on an e-commerce platform and the system doesn’t update the inventory, they can receive the incorrect goods or cancel their transaction. The customer experience would suffer, and the business’s reputation would suffer.
To guarantee data consistency, reliability, and accuracy, it is crucial for product engineering to comprehend and implement ACID features in databases. It can assist product managers, and developers in building reliable, resilient products that satisfy user demands and expectations.
Atomicity: Refers to the requirement that a transaction be treated as a single, unified unit of work. A transaction can comprise one or more database operations but fails simultaneously. If any operations fail, the entire transaction must be rolled back to restore the database to its previous state.
Consistency: Consistency ensures that a transaction moves the database from one consistent state to another. It means that any constraints or rules defined in the database must be followed, and the database remains valid even if errors or system failures occur. For instance, if a transaction involves updating a bank account’s balance, the balance should always reflect the correct amount, regardless of any intermediate errors.
Isolation: Isolation prevents concurrent transactions from interfering with one another. Multiple transactions can run concurrently, but each transaction must act as if it is the only one running in the system.
This means that a transaction should not be able to see another transaction’s intermediate state, and changes made by one transaction should not affect the outcome of another. Isolation levels such as Read Committed, Repeatable Read, and Serializable provide varying isolation guarantees.
Durability: When a transaction is committed, the changes must persist even if the system fails, crashes, or loses power. This is typically accomplished by using transaction logs, which record all changes made by a transaction before they are applied to the database.
In the event of a failure, these logs can be used to restore a consistent state to the database.
Implementing ACID properties in databases necessitates careful database system design and implementation. Some of the most critical factors to consider when ensuring ACID compliance are as follows:
Transaction management: As a fundamental concept, the database system must support transactions and provide mechanisms for initiating, committing, and rolling back transactions. The system must also ensure that transactions are atomic, meaning that all operations in a trade either succeed or fail simultaneously.
Consistency check: The database system must enforce consistency constraints, such as data type checks, referential integrity, and business rules. The system must validate data before committing changes to ensure the database remains consistent.
Isolation levels: The database system must provide different isolation levels to support concurrent transactions. The system must ensure that transactions are separated so that the outcome of one does not affect the outcome of another.
Transaction logs: The database system must keep transaction logs to ensure durability. The registers must record all changes made by a transaction before they are applied to the database, and in the event of a failure, the system must be able to use these logs to restore the database to a consistent state.
Backup and recovery: If something goes wrong, the database system must include mechanisms for backing up and recovering the database. This may entail performing regular database backups, keeping redundant copies of the data, or employing high-availability techniques such as replication and clustering.
Conclusion
To implement ACID properties in a database system, you can use a database management system (DBMS) that supports these properties. Popular DBMSs that support ACID properties include SQL platforms, Oracle, Microsoft SQL Server, PostgreSQL, and MySQL. Additionally, you can design your database schema and application code to ensure that transactions adhere to the ACID properties. For example, you can use stored procedures and triggers to enforce constraints and ensure that trades are executed atomically. Finally, you can test your application thoroughly to ensure it behaves correctly under various failure scenarios.
Machine learning is a powerful tool that has revolutionized many industries. From finance to healthcare, businesses are leveraging machine learning to gain insights into their data, make predictions, and automate decision-making.
However, training and deploying machine learning models can be complex. This is where Kubernetes comes in. Kubernetes is an open-source container orchestration platform that can simplify this process.
In addition to handling machine learning model deployment and training in product engineering, Kubernetes is a potent tool for managing containerized workloads. This article will discuss how Kubernetes can be used for machine learning model training and deployment.
What is Kubernetes?
Kubernetes is a container orchestration platform that automates containerized applications’ deployment, scaling, and management. Google developed it, and is now maintained by the Cloud Native Computing Foundation (CNCF). Kubernetes makes it easy to manage and deploy complex applications by automating many of the tasks associated with containerization. It is designed to work with many containers, including Docker, and can be used with any cloud provider or on-premise data center.
Using Kubernetes for Machine Learning Model Training
Kubernetes can be used for machine learning model training in several ways. One of the most common ways is using Kubernetes to manage the containerized environment where the machine learning models are trained. This can include controlling the hardware resources, such as GPUs, used for training and managing the data storage and networking infrastructure required for large-scale machine learning model training.
Kubernetes can also manage the entire machine learning model training pipeline. This includes working on the data preprocessing, model training, and model evaluation stages. Kubernetes can orchestrate the whole pipeline, from pulling data from a data source to running the training job to storing the trained model in a container.
Using Kubernetes for Machine Learning Model Deployment
Once a machine learning model is trained, it must be deployed in a production environment. This is where Kubernetes can be beneficial. Kubernetes can be used to manage the deployment of machine learning models in a containerized environment. This includes managing the hardware resources, such as CPUs and GPUs, used to serve the machine learning model and the networking infrastructure required to do the model to end users.
Kubernetes can also be used to manage the entire machine-learning model deployment pipeline. This includes managing the data ingestion, preprocessing, model serving, and evaluation stages. Kubernetes can orchestrate the whole pipeline, from ingesting data to fitting the model to end users.
Benefits of Using Kubernetes for Machine Learning
Using Kubernetes for machine learning model training and deployment has several benefits. One of the most significant is the ability to scale horizontally. Kubernetes can automatically scale up or down the number of containers running the machine-learning model based on the workload. This allows businesses to handle large-scale machine learning workloads without investing in additional hardware infrastructure.
Another benefit of using Kubernetes for machine learning is the ability to manage complex workflows. Machine learning workflows can be complicated, involving multiple stages of data preprocessing, model training, and model deployment. Kubernetes can orchestrate these workflows, making it easier for businesses to manage and deploy machine learning models.
Finally, Kubernetes can improve the reliability and availability of machine learning models. Kubernetes includes built-in features for managing container health, such as automatic restarts and failovers. This ensures that machine learning models are always available, even during a hardware failure or other issues.
Conclusion
Kubernetes is a powerful tool for managing the containerized environment required for machine learning model training and deployment. By using Kubernetes in product engineering, businesses can automate many of the tasks associated with containerization, making it easier to manage complex machine-learning workflows. Kubernetes can also improve the scalability, reliability, and availability of machine learning models, making it an ideal platform for businesses looking to leverage the power of machine learning.
Creating an efficient database schema is critical for any organization that relies on data to run its operations. A well-designed schema can help with data management, system performance, and maintenance costs. A crucial step in product engineering is designing an effective database schema, which calls for careful consideration of several aspects, including scalability, performance, data integrity, and simplicity of maintenance.
This article will give us fundamental principles and best practices to remember when creating an efficient database schema.
Identify the data entities and relationships.
Identifying them and their relationships is the first step in designing an efficient database schema. This can be accomplished by analyzing business requirements and identifying key objects and concepts that must be stored in the database.
Once the entities have been identified, their relationships must be defined, such as one-to-one, one-to-many, or many-to-many.
Normalize the data
Normalization is the process of combining data in a database to reduce redundancy and improve data integrity. There are several levels of normalization, with the first, second, and third standard forms being the most commonly used. Normalization prevents data duplication and ensures that updates are applied consistently throughout the database.
Use appropriate data types: Selecting the correct data type for each column is critical to ensure the database is efficient and scalable. For example, using an integer data type for a primary key is more efficient than using a character data type.
Similarly, using a date data type for date columns ensures fast and accurate sorting and filtering operations.
Optimize indexing
Indexing improves query performance by creating indexes on frequently used columns in queries. Based on the column’s usage pattern, the appropriate type of index, such as clustered or non-clustered, must be selected. On the other hand, over-indexing can cause the database to slow down, so it’s essential to strike a balance between indexing and performance.
Consider partitioning
Partitioning is a technique for dividing a large table into smaller, more manageable sections. This can improve query performance, speed up backup and restore operations, and make maintenance easier. Date ranges, geographic regions, and other logical groupings can all be used to partition data.
Use constraints and triggers.
Rules and triggers can improve data integrity and consistency. For example, a foreign key constraint can help prevent orphaned records in a child table, whereas a check constraint can ensure that only valid data is entered into a column. Triggers can also be used to impose business rules and validate complex data.
Plan for future scalability
Creating an efficient database schema entails optimizing performance today and planning for future scalability. This entails scheduling for future growth and designing the system to accommodate it. Partitioning large tables, optimizing indexes, and preparing for horizontal scaling with sharding or replication can all be part of this.
Conclusion
Finally, designing an efficient database schema necessitates careful planning and considering numerous factors. By following the best practices outlined in this article, you can create an efficient, scalable, and maintainable schema that meets your organization’s product engineering needs now and in the future.
The world of technology has witnessed a significant shift towards containerization as a preferred way of developing and deploying software applications. Using containers provides a convenient and reliable means of delivering applications in various environments. However, with increased usage, container security has become a pressing issue that requires addressing.
Securing containers in product engineering is essential to ensuring the safety and protection of data, applications, and systems. This article will delve into container security’s intricacies and explore the best practices for securing your containers against potential threats.
What Is Container Security?
Containers are a popular technology for developing and deploying applications due to their ease of use and portability across different environments. However, with the increasing use of containers, security has become a critical concern for organizations looking to protect their applications and data.
Container security refers to the practices and technologies used to safeguard containerized applications, their data, and the environment where they run from potential security threats.
Securing containers involves implementing several measures to ensure that containerized applications are protected from malicious attacks that can compromise their security and integrity.
Container Security Challenges
Although there are many benefits to using containers, they also present some security risks that can be difficult to address. Due to the large number of containers based on many different underlying images, each of which can have vulnerabilities, the security of containerized workloads presents a more excellent attack surface than traditional workloads.
A further critical issue is the typical kernel architecture of containers. Protection cannot be guaranteed simply by securing the host. In addition, you should keep secure configurations to restrict container permissions and ensure correct isolation between containers.
Due to the ever-changing nature of containerized environments, monitoring containerized workloads can be difficult. Conventional monitoring tools may be unable to determine which containers are active, what they are doing, or analyze their network activity.
Gaining as much insight as possible is essential for detecting problems quickly and preventing breaches in your product engineering efforts.
Container Security Best Practices
1. Securing Images: The construction of containers begins with using container images. Containers in production can be compromised by misconfiguration or malicious activities within container images. Protecting container images is essential for the well-being of your containerized workloads and applications. Several approaches are outlined below:
Include your application in a container image: A container image consists of a portion of the operating system and the containerized application. Your picture is vulnerable to any libraries and tools you add to it. The application must be deployed inside the container image to protect it from these risks. The final product should be a binary that has been statically built and has all the necessary dependencies.
Include as little as possible: Discard any features that aren’t essential to the program’s operation. Take the UNIX binaries sed and awk, which are installed by default, and delete them. As a result, you’ll be less exposed to attacks.
Use trustworthy images: You should only use credible photos if you aren’t making the image from scratch. Docker Hub and other public image repositories are accessible to anyone and could potentially host malicious software or incorrect settings.
2. Securing Registries: In most cases, public or private registries are used to store container images. Protecting these repositories ensures all team members and collaborators use the most secure photos possible. Multiple strategies to safeguard container registries are outlined below.
Use access control: Having a private registry means you can set strict rules about who can view and share your images. By restricting who can view, edit, or delete your photos, access control serves as a fundamental security measure.
Sign your images: Images can be traced back to their signatories with signatures. A key feature is the difficulty of replacing the signed print with a compromised one. Docker‘s Content Trust mechanism details the process of signing images. The notary is an open-source application for digitally signing and verifying images.
Scan your images: Exposure scanners scan for vulnerabilities to expose existing ones. Using these instruments, critical flaws in security can be discovered, and dangerous threats can be identified. Scanners can be used continuously to check for essential vulnerabilities in your registries.
3. Securing Deployment: When it comes to keeping your deployments safe, consider the following options:
Secure the target environment: This can be achieved by enhancing the security of the underlying host OS. You can restrict access by setting up a firewall and VPC rules or using individual accounts.
Use an orchestration platform: These systems typically offer protected API endpoints and role-based access control (RBAC), which can lessen the likelihood of unauthorized access.
Use immutable deployments: To do this, an instance image must be created during construction. After that, new instances can be spun up in your deployment from this image. Whenever an application is updated, it necessitates the creation of new photos, the launch of new instances, and the eventual destruction of the old ones.
4. Securing Container Runtime: You can improve runtime security following these best practices.
Create separate virtual networks for your containers: This adds a barrier that can shield the system from outside interference.
Apply the principle of least privilege:Ensure that only necessary containers can communicate with one another.
Expose only the ports that serve the application: Only SSH ports should be open. This guiding principle applies to both containers and their host machines.
Use the Docker Image policy plugin:This plugin blocks any unapproved process from downloading images.
5. Using Thin, Short-Lived Containers to Reduce Your Attack Surface
The very nature of a container is that it is temporary and light. They are not meant to function in the same way that servers do. Instead of updating once every few weeks or months, you should avoid constantly adding new files to the container.
In essence, you are expanding the attack surface without keeping up with it, which can weaken your security posture.
Keep the contents of each container to a minimum, and ensure they’re all as thin as possible. As a result, the attack surface can be minimized using this method. If you find a flaw in one of the default images, fix it immediately and then release a new container.
Containers and security go hand in hand. Apply the suggested procedures to protect the environments in which your containerized workloads are running. Containers are a vital tool that can help your business flourish, as was said in the beginning. Do not allow possible security dangers to hinder this development. A container can function fully if installed on a safe network.
We use cookies to give you the best experience on our website. By continuing to use this site, or by clicking "Accept," you consent to the use of cookies. Privacy PolicyAccept
Privacy & Cookies Policy
Privacy Overview
This website uses cookies to improve your experience while you navigate through the website. Out of these cookies, the cookies that are categorized as necessary are stored on your browser as they are essential for the working of basic functionalities of the website. We also use third-party cookies that help us analyze and understand how you use this website. These cookies will be stored in your browser only with your consent. You also have the option to opt-out of these cookies. But opting out of some of these cookies may have an effect on your browsing experience.
Necessary cookies are absolutely essential for the website to function properly. This category only includes cookies that ensures basic functionalities and security features of the website. These cookies do not store any personal information.
Any cookies that may not be particularly necessary for the website to function and is used specifically to collect user personal data via analytics, ads, other embedded contents are termed as non-necessary cookies. It is mandatory to procure user consent prior to running these cookies on your website.
We value your privacy. We don’t share your details with any third party
Download the Case study
We value your privacy. We don’t share your details with any third party
Download the Case study
We value your privacy. We don’t share your details with any third party
Download the Case study
We value your privacy. We don’t share your details with any third party
Download the Case study
We value your privacy. We don’t share your details with any third party
Download the Case study
We value your privacy. We don’t share your details with any third party
Download the Case study
We value your privacy. We don’t share your details with any third party
Download the Case study
We value your privacy. We don’t share your details with any third party
Download the Case study
We value your privacy. We don’t share your details with any third party
Download the Case study
We value your privacy. We don’t share your details with any third party
Download the Case study
We value your privacy. We don’t share your details with any third party
Download the Case study
We value your privacy. We don’t share your details with any third party
Download the Case study
We value your privacy. We don’t share your details with any third party
Download the Case study
We value your privacy. We don’t share your details with any third party
Download the Case study
We value your privacy. We don’t share your details with any third party
Download the Case study
We value your privacy. We don’t share your details with any third party
Download the Case study
We value your privacy. We don’t share your details with any third party
Download the Case study
We value your privacy. We don’t share your details with any third party
Download the Case study
We value your privacy. We don’t share your details with any third party
Download the Case study
We value your privacy. We don’t share your details with any third party
Download the Case study
We value your privacy. We don’t share your details with any third party
Download the Case study
We value your privacy. We don’t share your details with any third party
Download the Case study
We value your privacy. We don’t share your details with any third party
Download the Case study
We value your privacy. We don’t share your details with any third party
Error: Contact form not found.
Download the Case study
We value your privacy. We don’t share your details with any third party
Download the Case study
We value your privacy. We don’t share your details with any third party
Download the Case study
We value your privacy. We don’t share your details with any third party
Download the Case study
We value your privacy. We don’t share your details with any third party
Download the Case study
We value your privacy. We don’t share your details with any third party
Download the Case study
We value your privacy. We don’t share your details with any third party
Download the Case study
We value your privacy. We don’t share your details with any third party
Download the Case study
We value your privacy. We don’t share your details with any third party
HAPPY READING
We value your privacy. We don’t share your details with any third party
HAPPY READING
We value your privacy. We don’t share your details with any third party
Webinar
We value your privacy. We don’t share your details with any third party
HAPPY READING
We value your privacy. We don’t share your details with any third party
HAPPY READING
We value your privacy. We don’t share your details with any third party
HAPPY READING
We value your privacy. We don’t share your details with any third party
HAPPY READING
We value your privacy. We don’t share your details with any third party
HAPPY READING
We value your privacy. We don’t share your details with any third party
HAPPY READING
We value your privacy. We don’t share your details with any third party
Get your FREE Copy
We value your privacy. We don’t share your details with any third party
Get your FREE Copy
We value your privacy. We don’t share your details with any third party
Get your FREE Copy
We value your privacy. We don’t share your details with any third party
HAPPY READING
We value your privacy. We don’t share your details with any third party
HAPPY READING
We value your privacy. We don’t share your details with any third party
HAPPY READING
We value your privacy. We don’t share your details with any third party
HAPPY READING
We value your privacy. We don’t share your details with any third party
HAPPY READING
We value your privacy. We don’t share your details with any third party
Download our E-book
We value your privacy. We don’t share your details with any third party
HAPPY READING
We value your privacy. We don’t share your details with any third party
SEND A RFP
HAPPY READING
We value your privacy. We don’t share your details with any third party
 1-800-805-5783
 GET A QUOTE